 Kris
Kris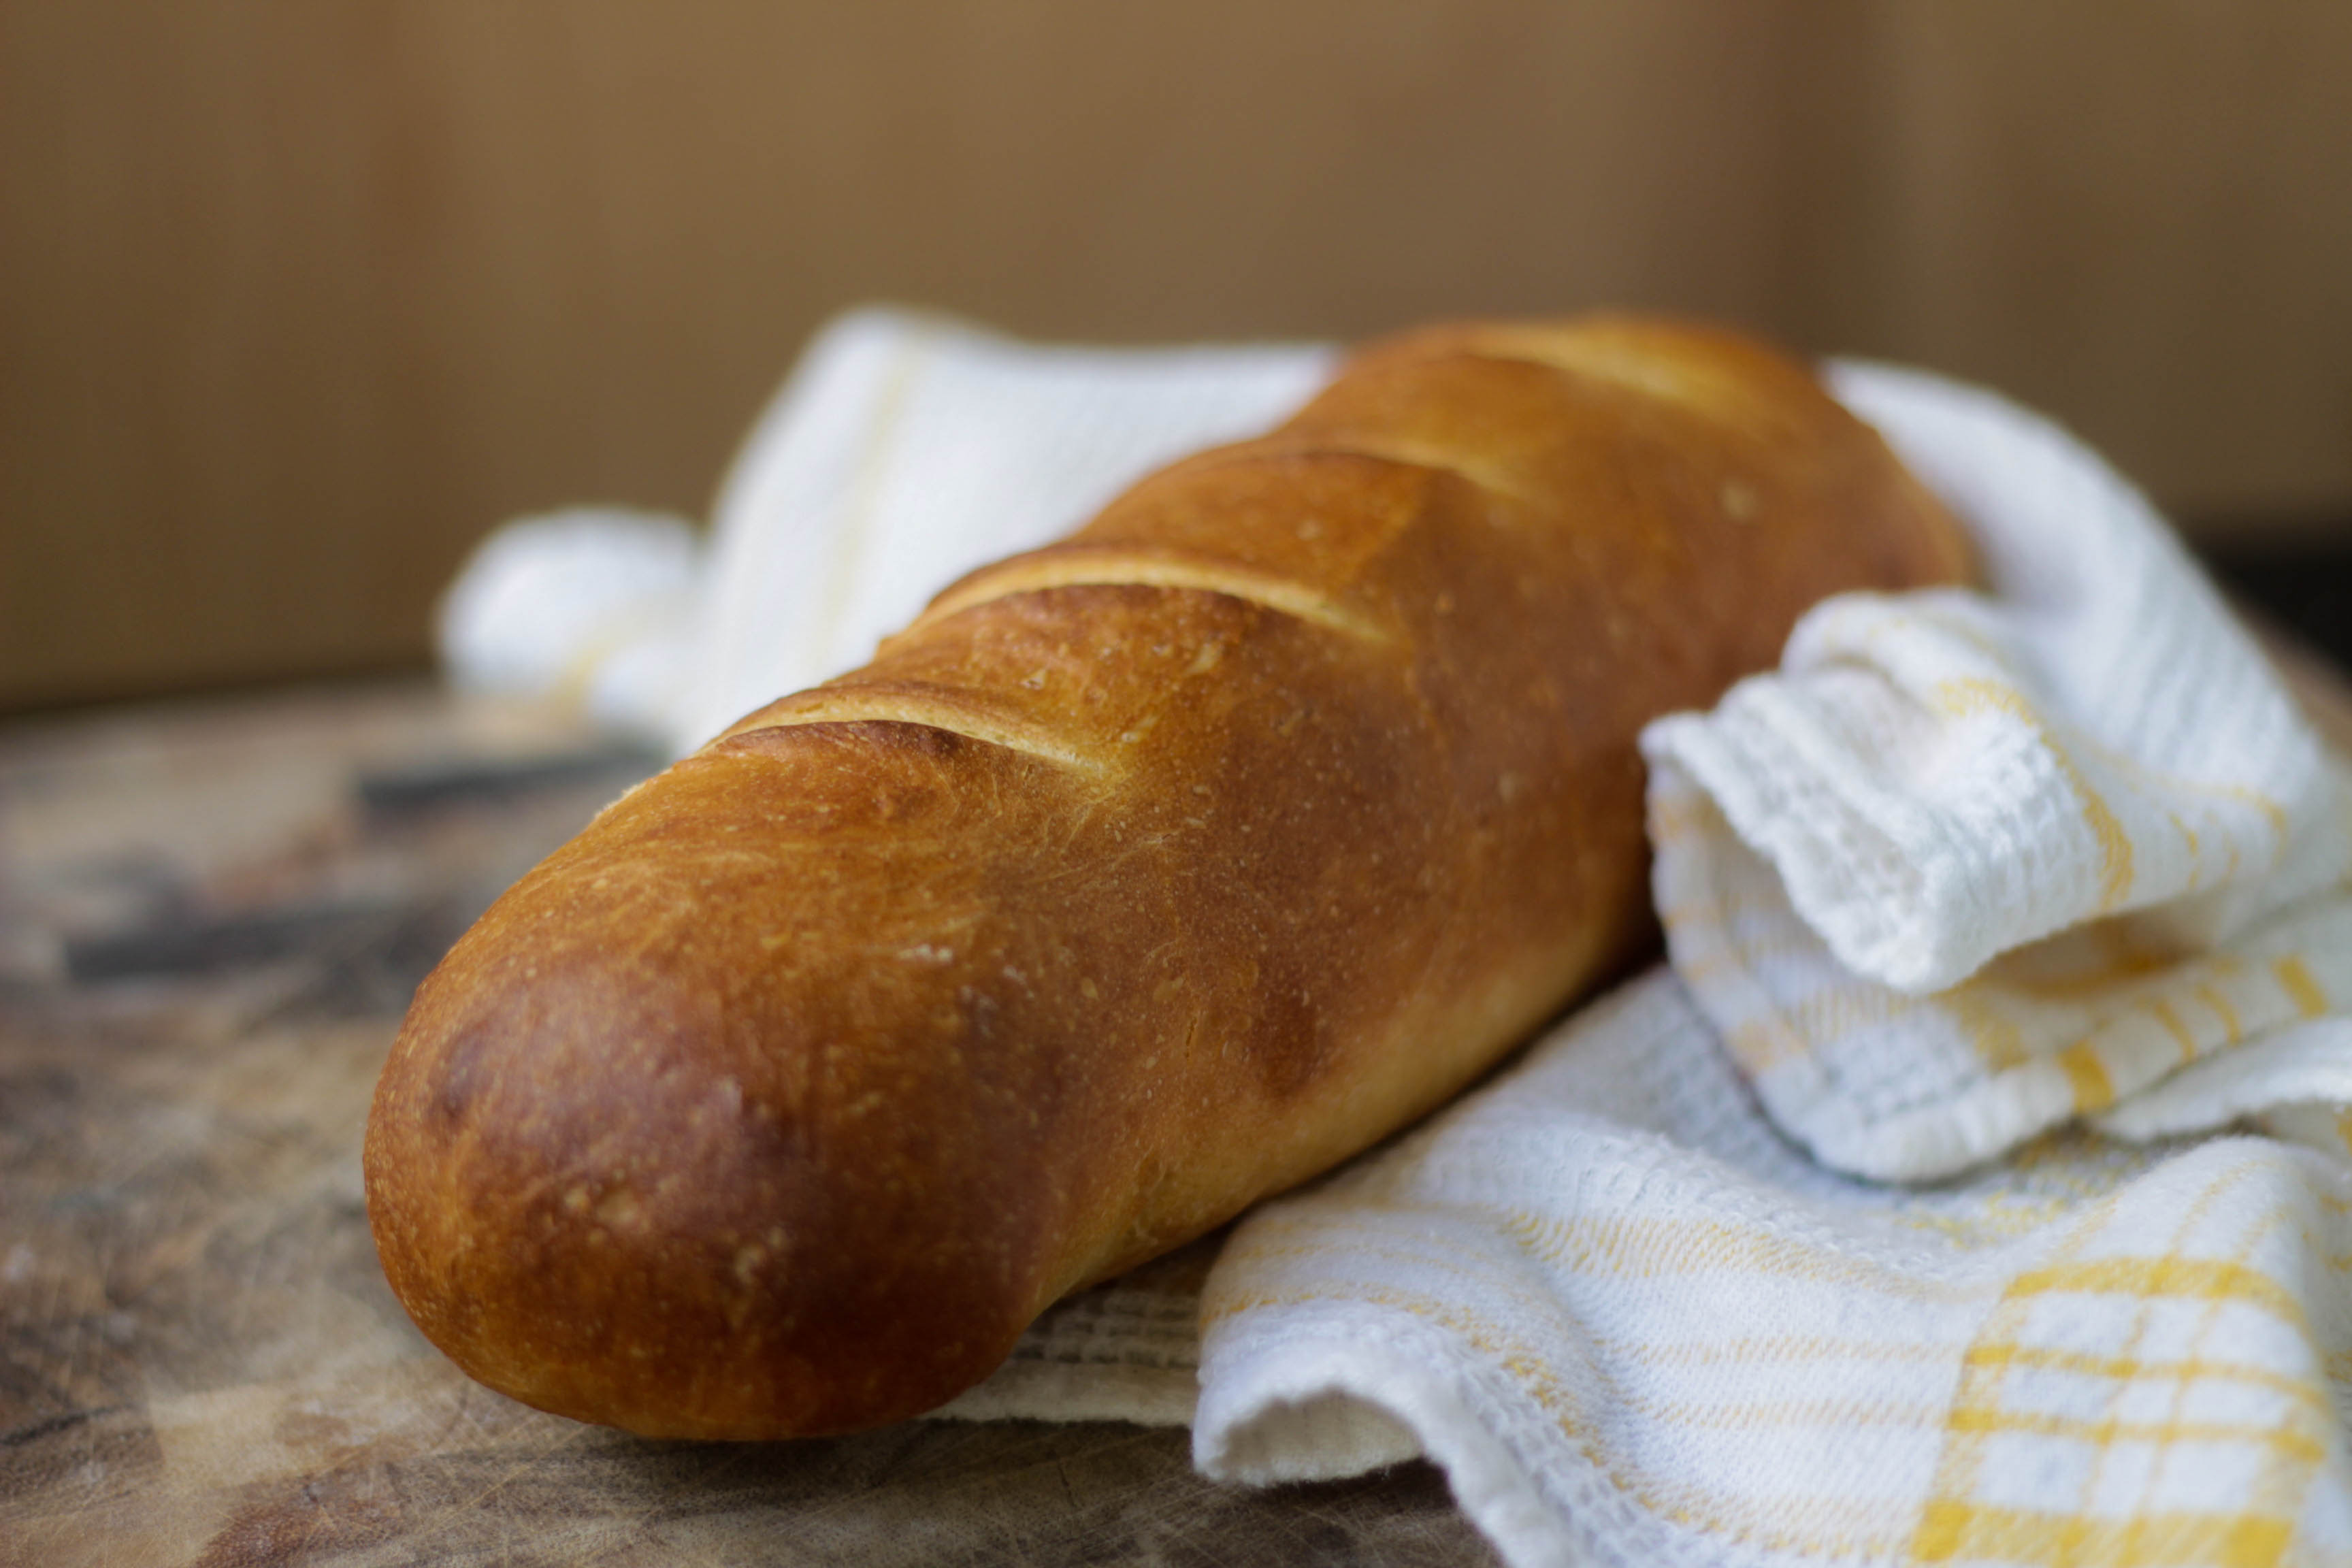

Hello! I love bread, don’t you? It may not be the most diet-friendly food around… or easiest to make at times… but man, that first bite from a freshly baked loaf can’t be beat. My first post on here was about how baking bread isn’t as intimidating as you would think. And this post–well, normally I would list the recipe, but I can’t claim any kind of credit for it and will therefore kindly link you to Steamy Kitchen. Jaden’s step-by-step details on how to make French bread are what eased me into trying it in the first place. It is an absolute gem of a recipe that I use time and time again for a perfect loaf–and I can’t recommend it enough!
So what is the point of this entry, then? Well–I figured I would fill in the gaps from her recipe with pictures! The hardest part of this recipe was picturing how to do certain steps as an utter novice, so I figured I would take a few pictures of my process and hope they encourage others to give baking bread a shot. In the end, practice makes perfect–I don’t believe I’m anywhere near skilled at baking bread yet, but I do see marked improvement each time I bake. Hopefully you will find these pictures as helpful as I intend them to be!
Okay, gross–what is that? It looks like it… kneads something…
Yeah, I’ll stop now.
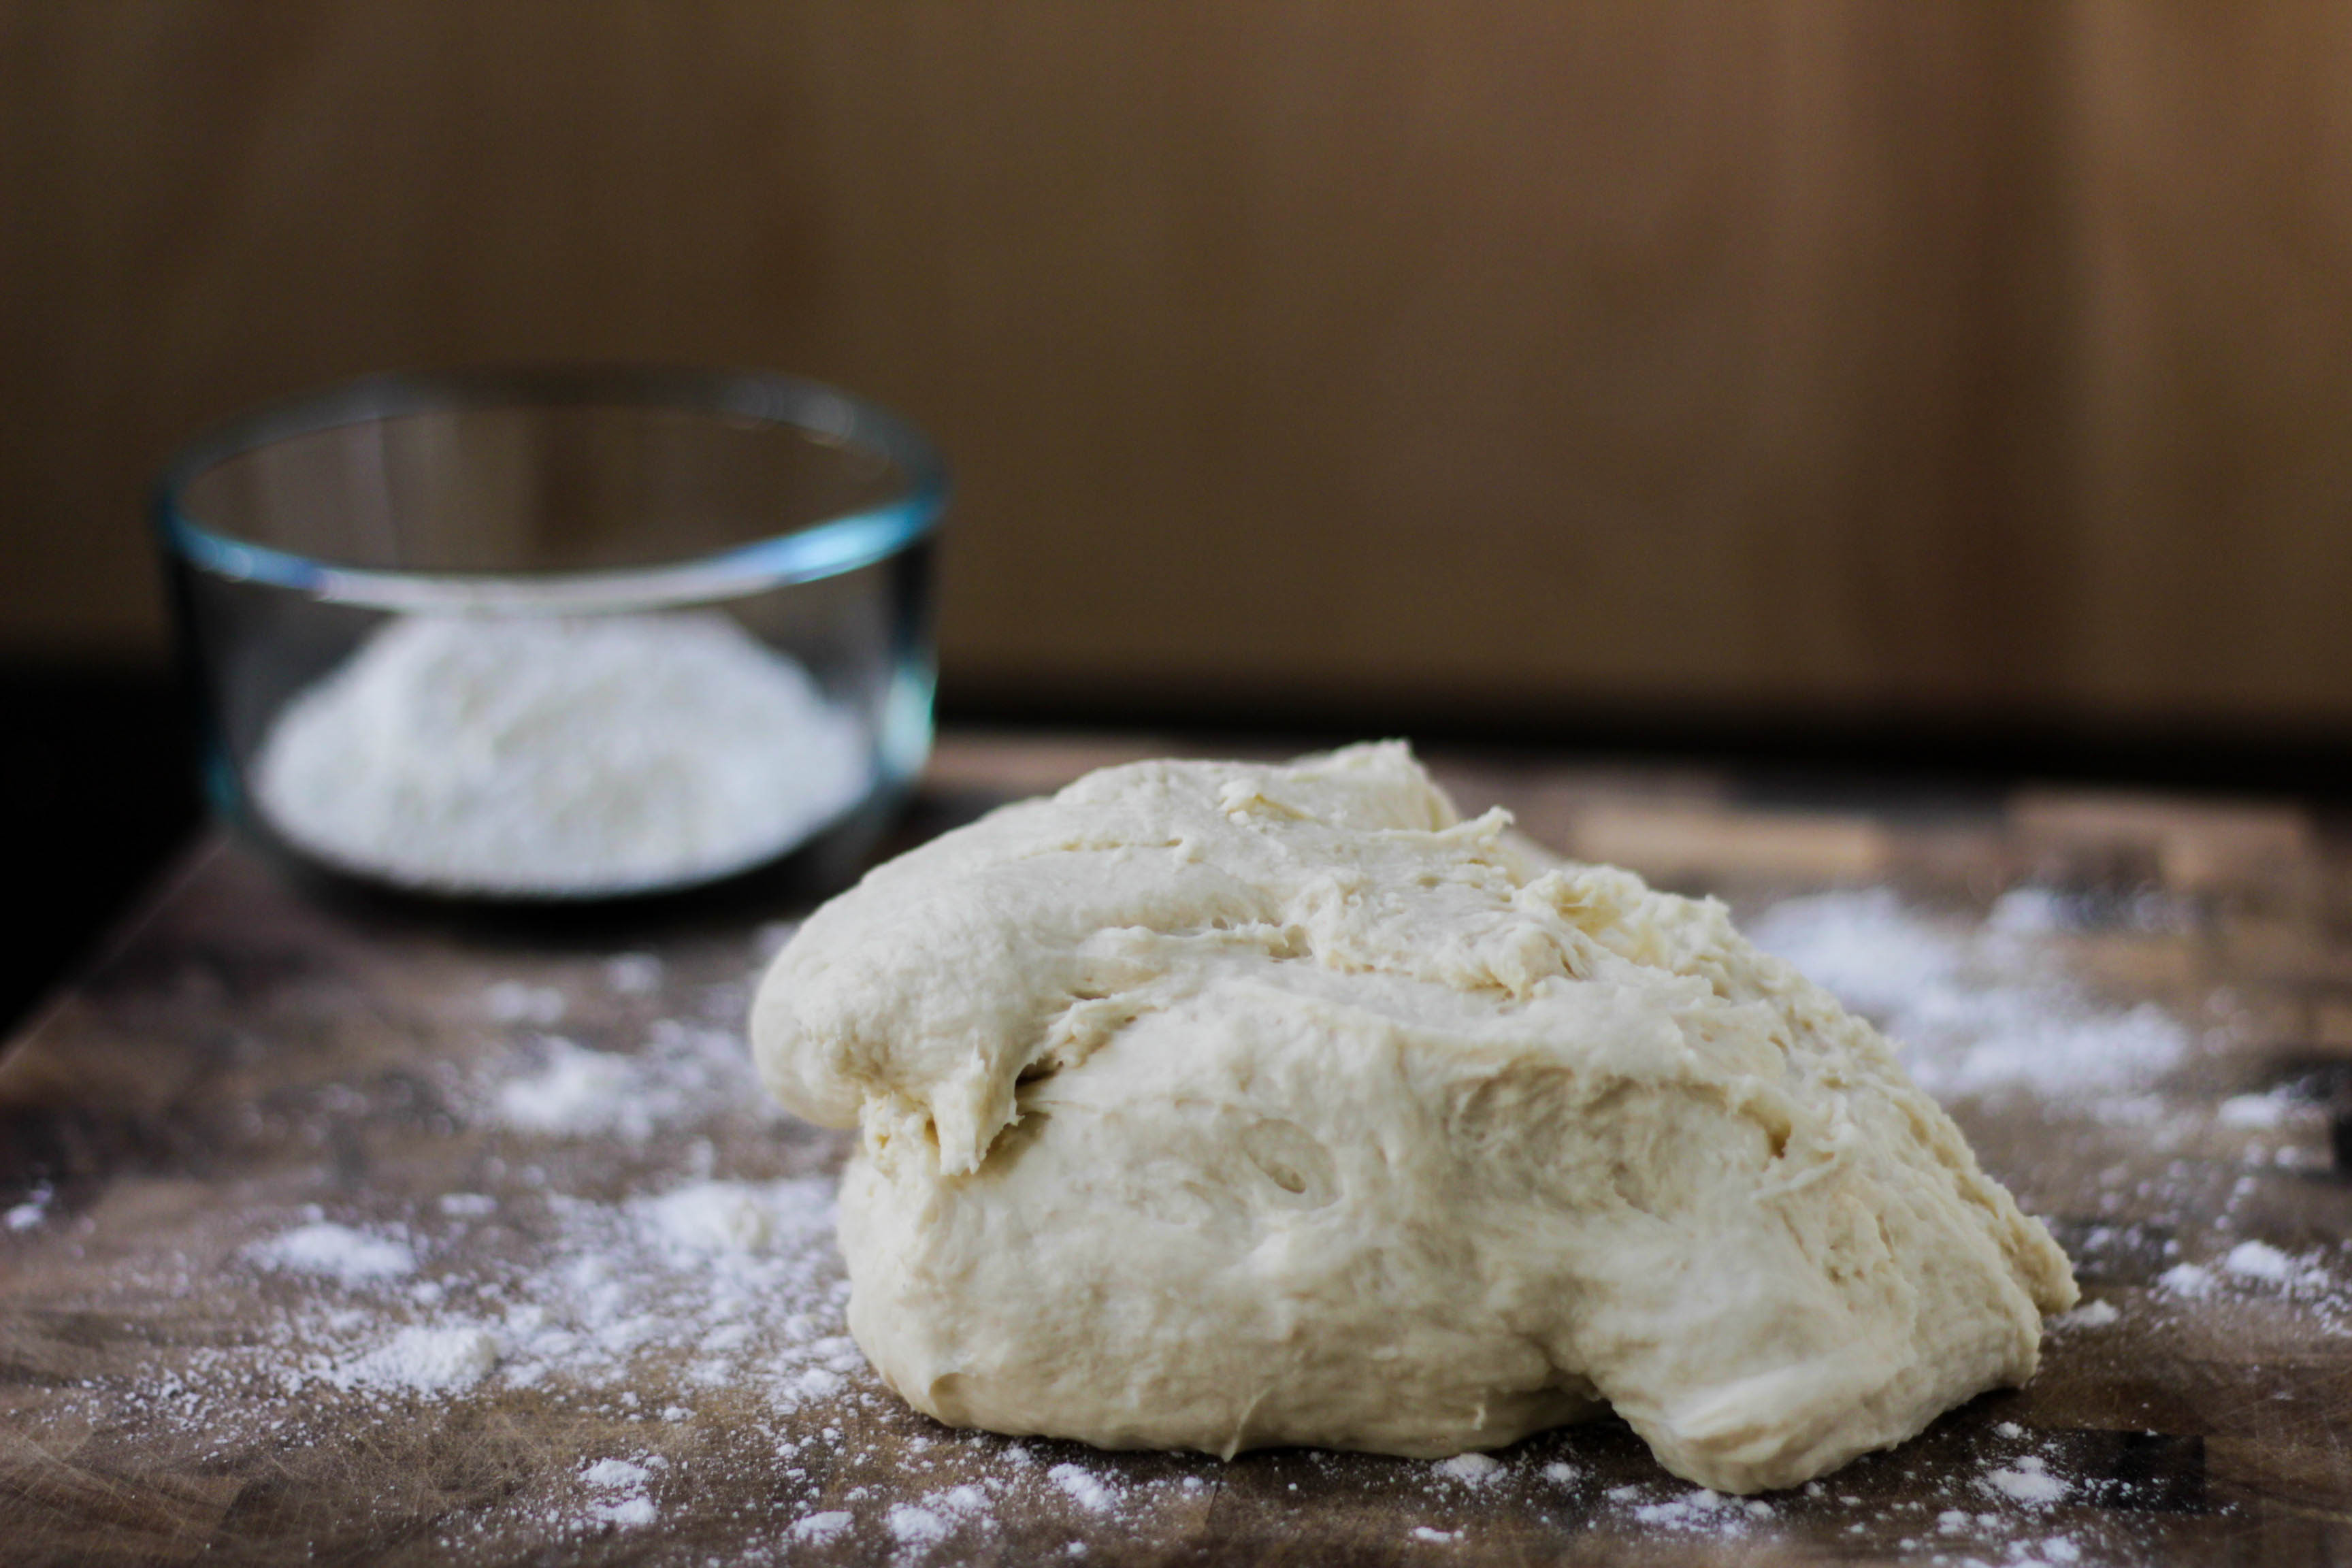
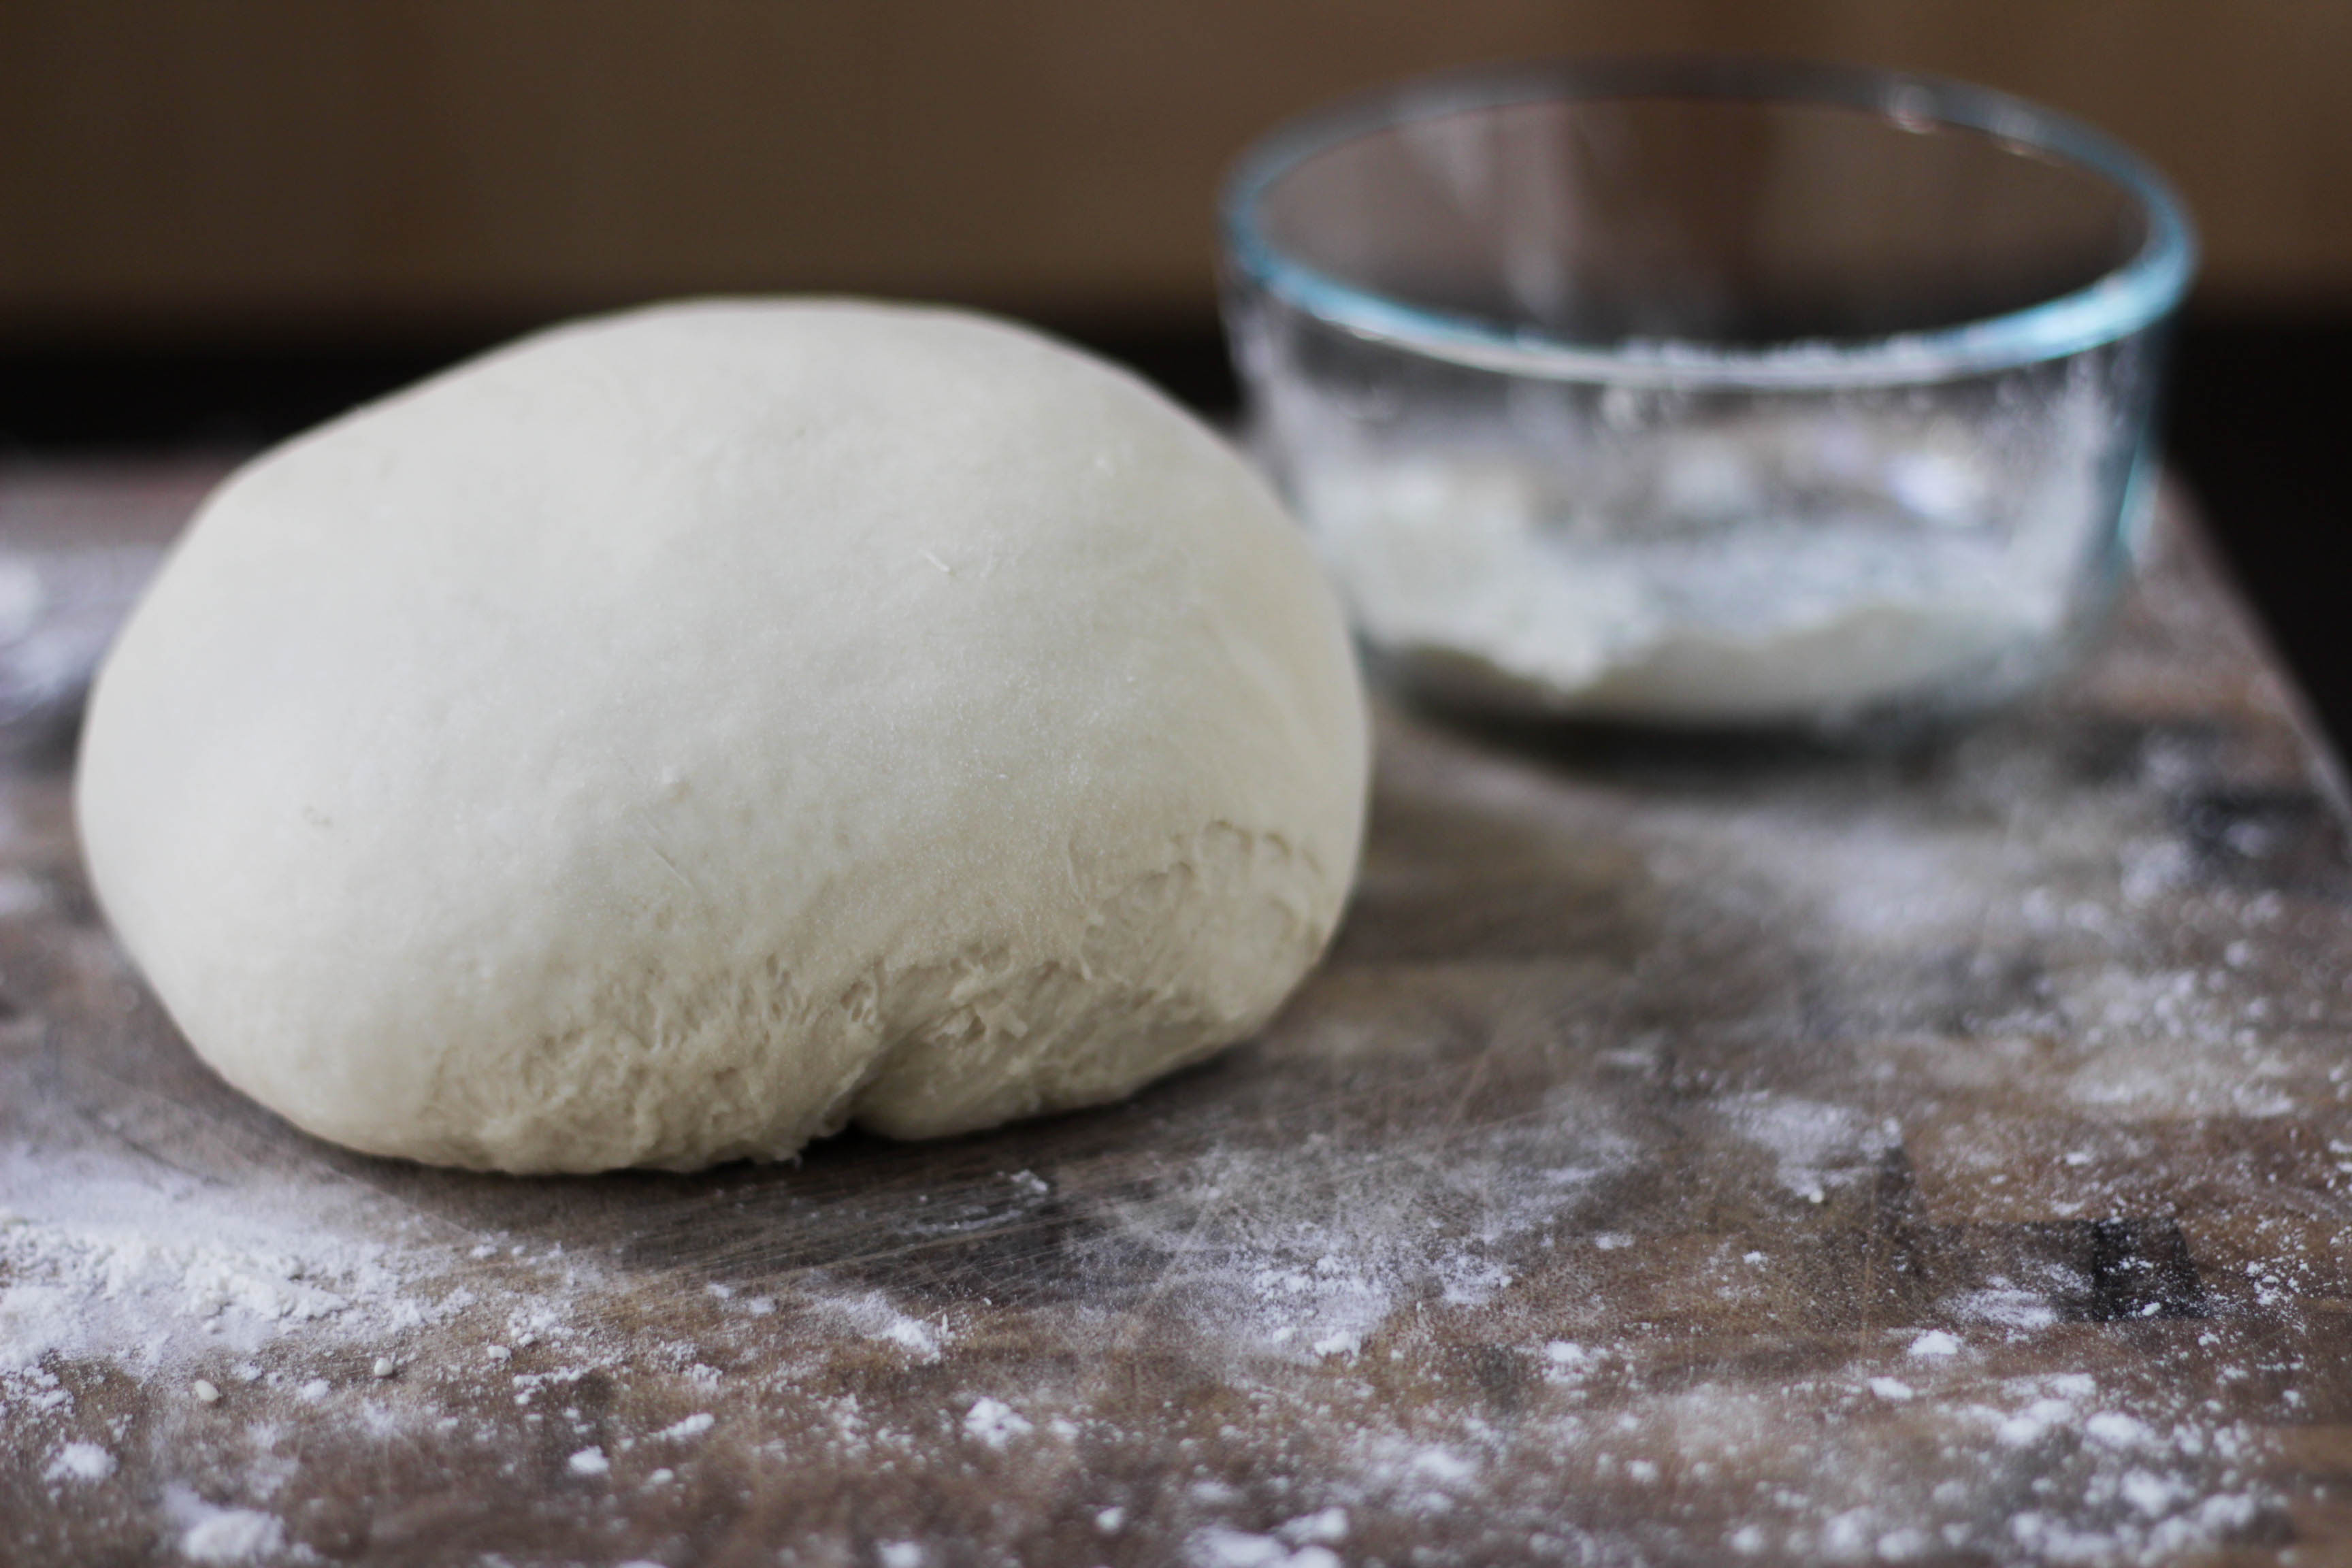
So the recipe calls for the bread to initially be mixed with a stand mixer before turning it out onto a lightly floured surface to work the last 1/4 cup (bread) flour into the dough. When you first turn it out, it will be sticky and kind of a pain to work with–this is normal! Just keep pouring a little bit of flour onto the top of the dough, press it in, then knead. How, you ask?
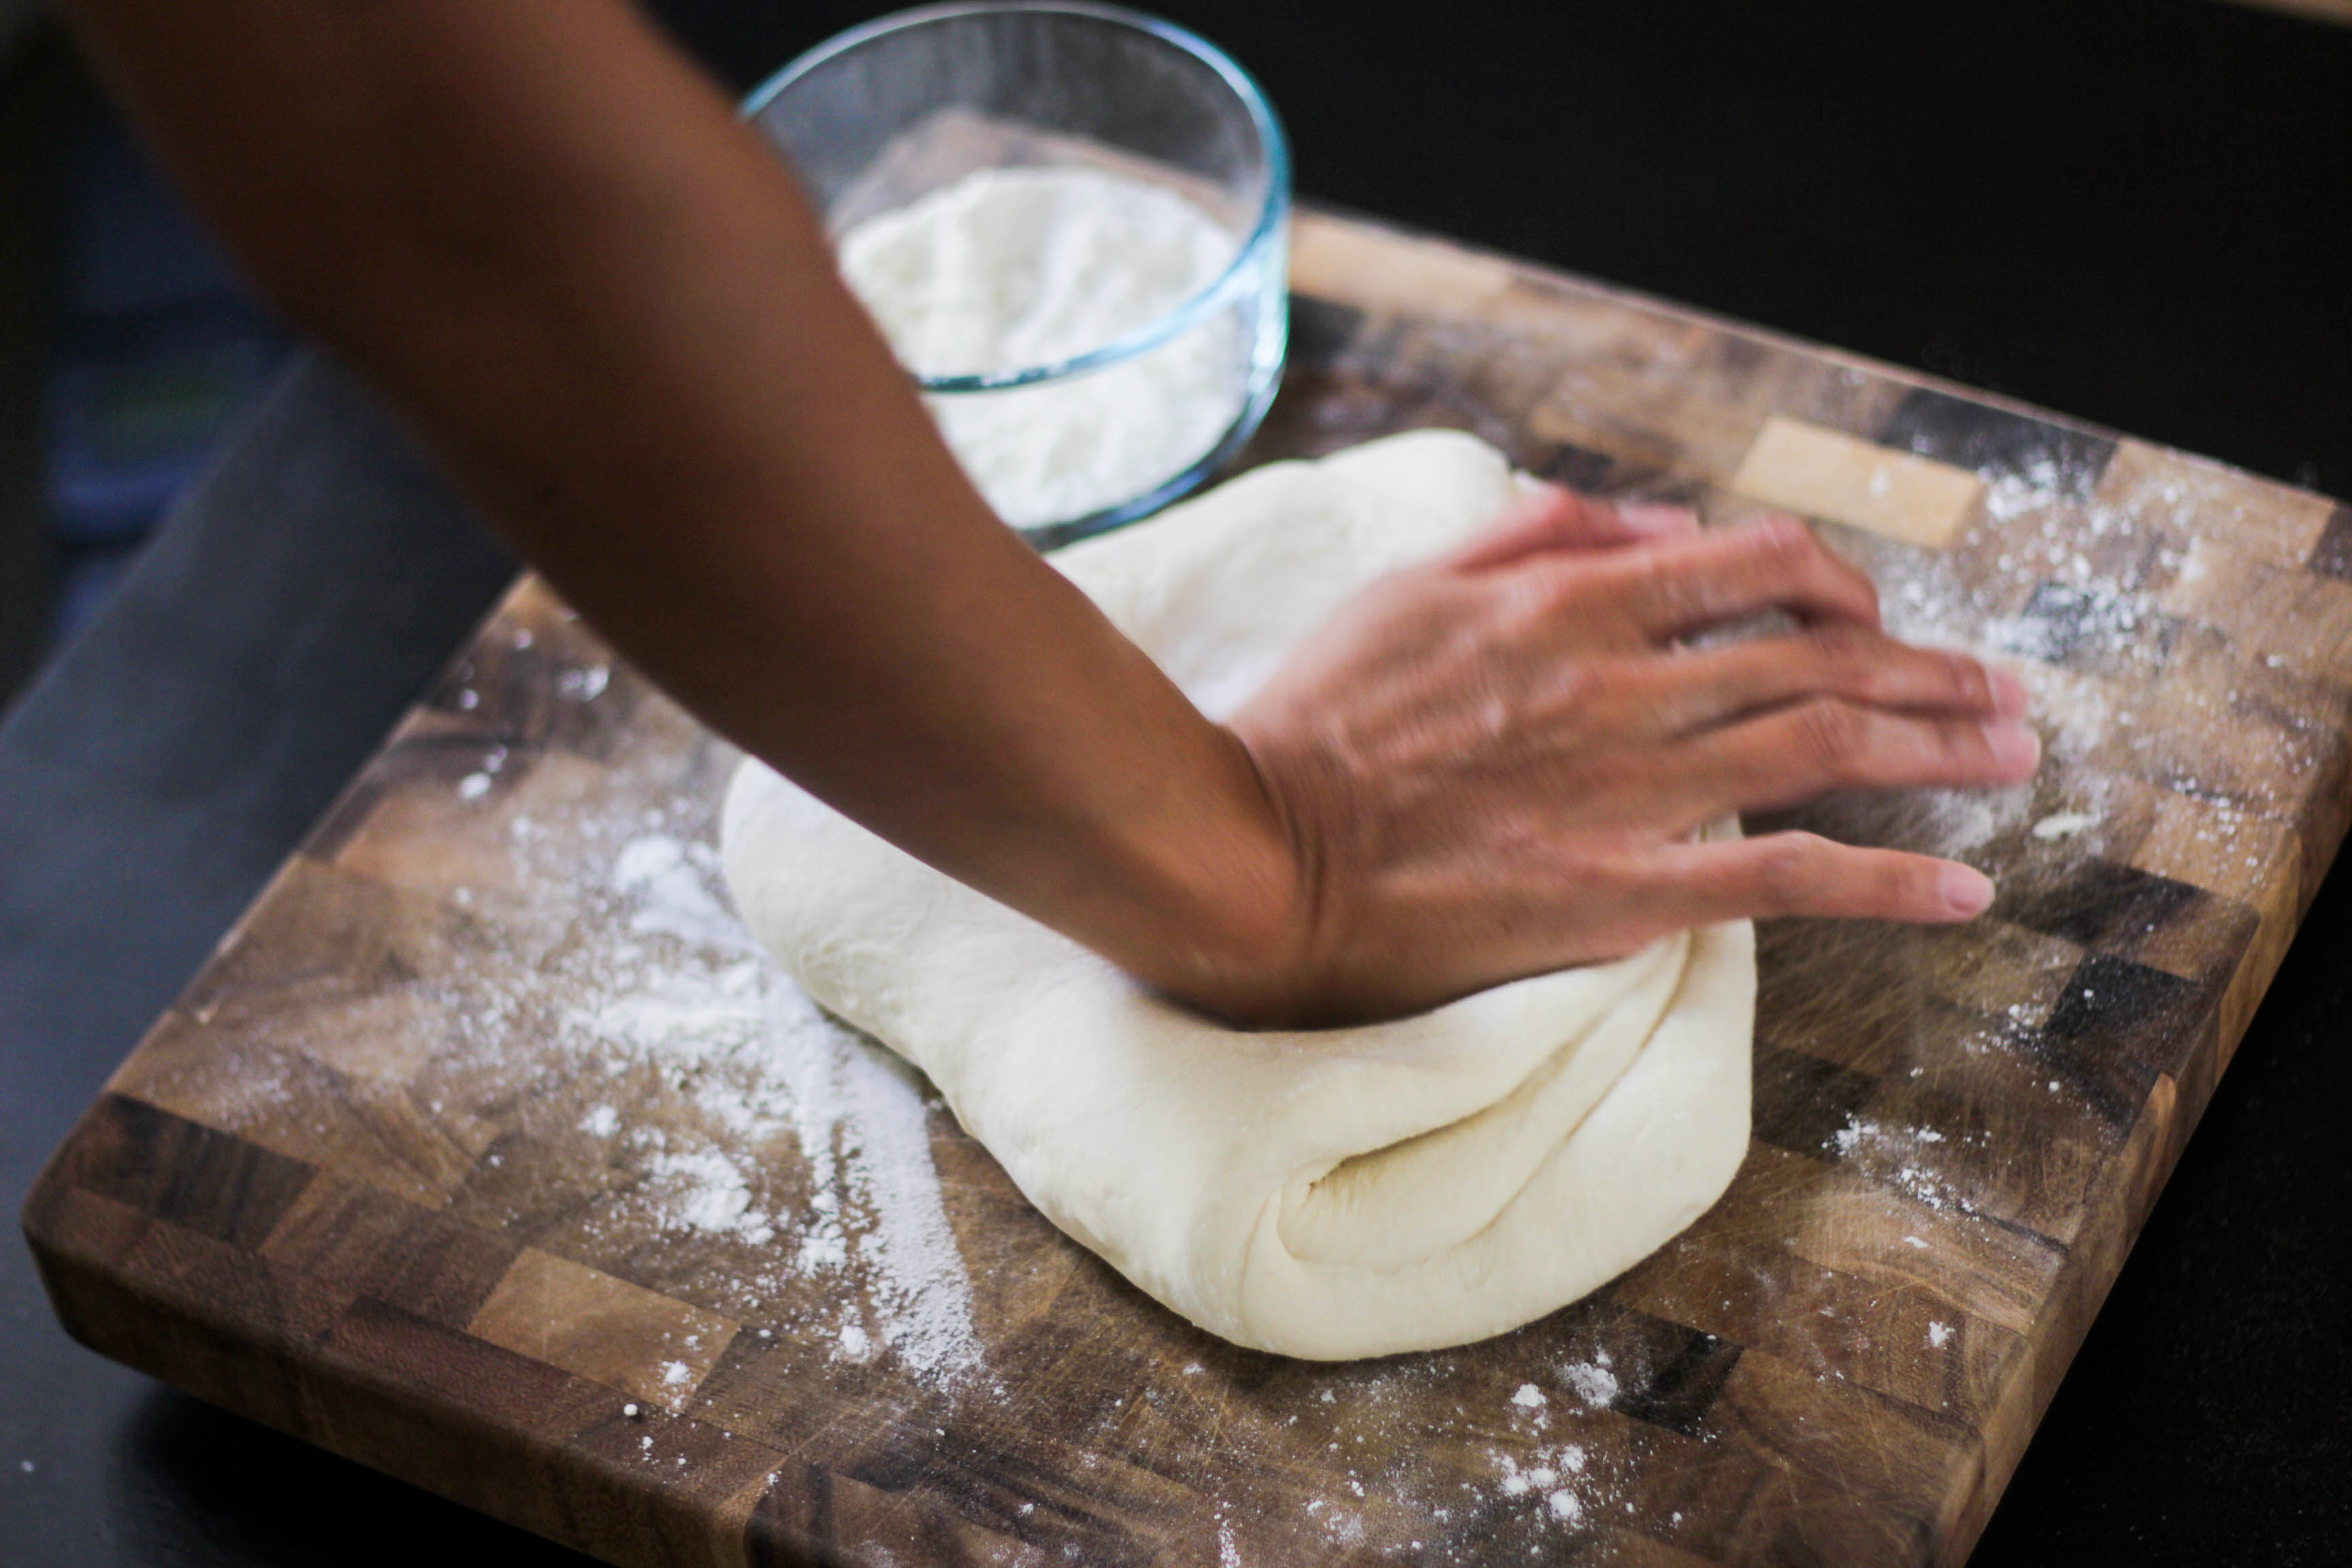
Fold the dough in half away from you (it will look like a taco laying down–see where the fold lies in the picture above?) then press with the heel of your palm. Continue to press around the fold and the dough surface until the fold is indistinguishable–then give the dough a quarter-turn (top becomes the right side, bottom becomes the left, etc.) and repeat. Continue doing this for another 5-7 minutes, until the dough is smooth and satiny; most importantly, the dough will be elastic. Pull the rough edges underneath the mound to form a ball and pinch the bottom together so it holds a ball shape, like so:
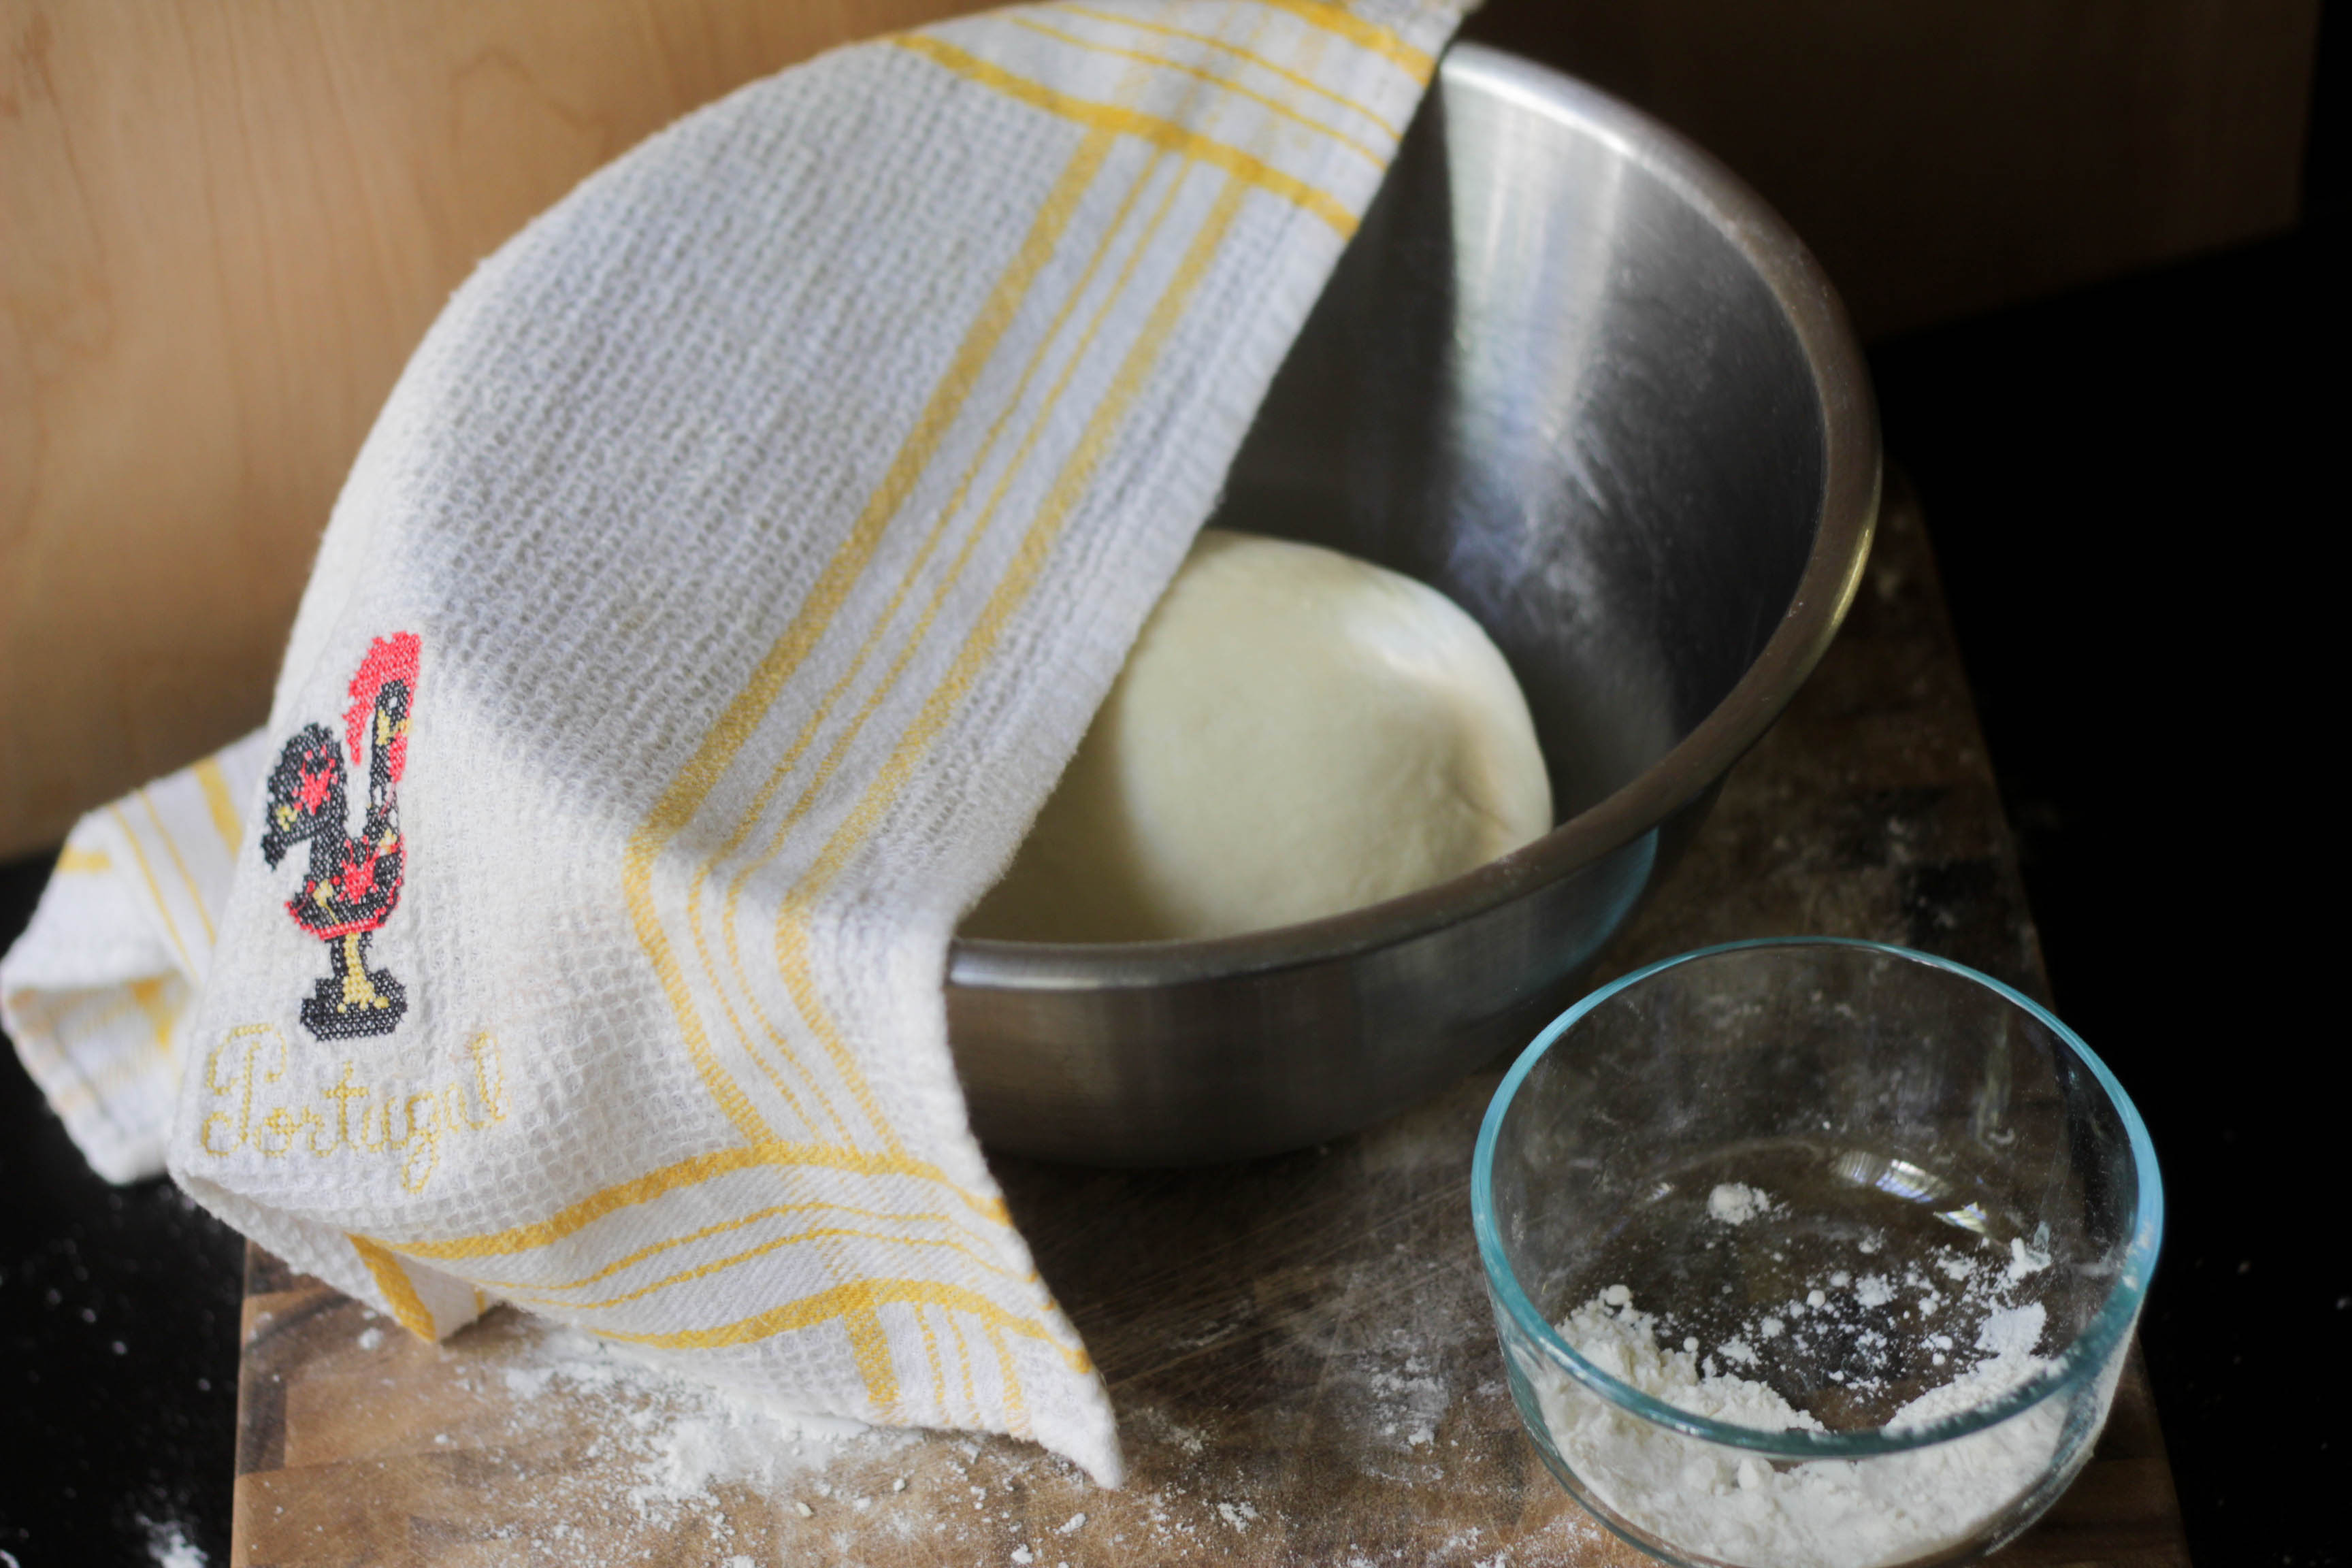
And now it’s time to let your ball of dough rise for its first leavening! Use non-stick spray (or rub butter or oil) on the inside of a larger bowl, then place your dough ball in the bowl, smooth-side up. Don’t forget to rub the ball around the bowl so that the oil/butter will coat the surface of the dough! After that, cover the bowl with a dish towel and set a timer for an hour. To speed up the process, you can place the dough near the oven.
 After an hour has passed, you’ll see that the dough has doubled in size. Congratulations, your yeast is burping! Or producing gas as a by-product… same thing.
 Quite the difference, isn’t it?
Divide the dough into two–we’re making two loaves. Leave one of the balls of dough underneath a dish towel to keep it from drying out. Stretch out the other piece of dough until it reaches ~1 foot in length. For an even loaf, I pull the dough until it is oblong, then roll it between my palms to keep the dough distribution even.
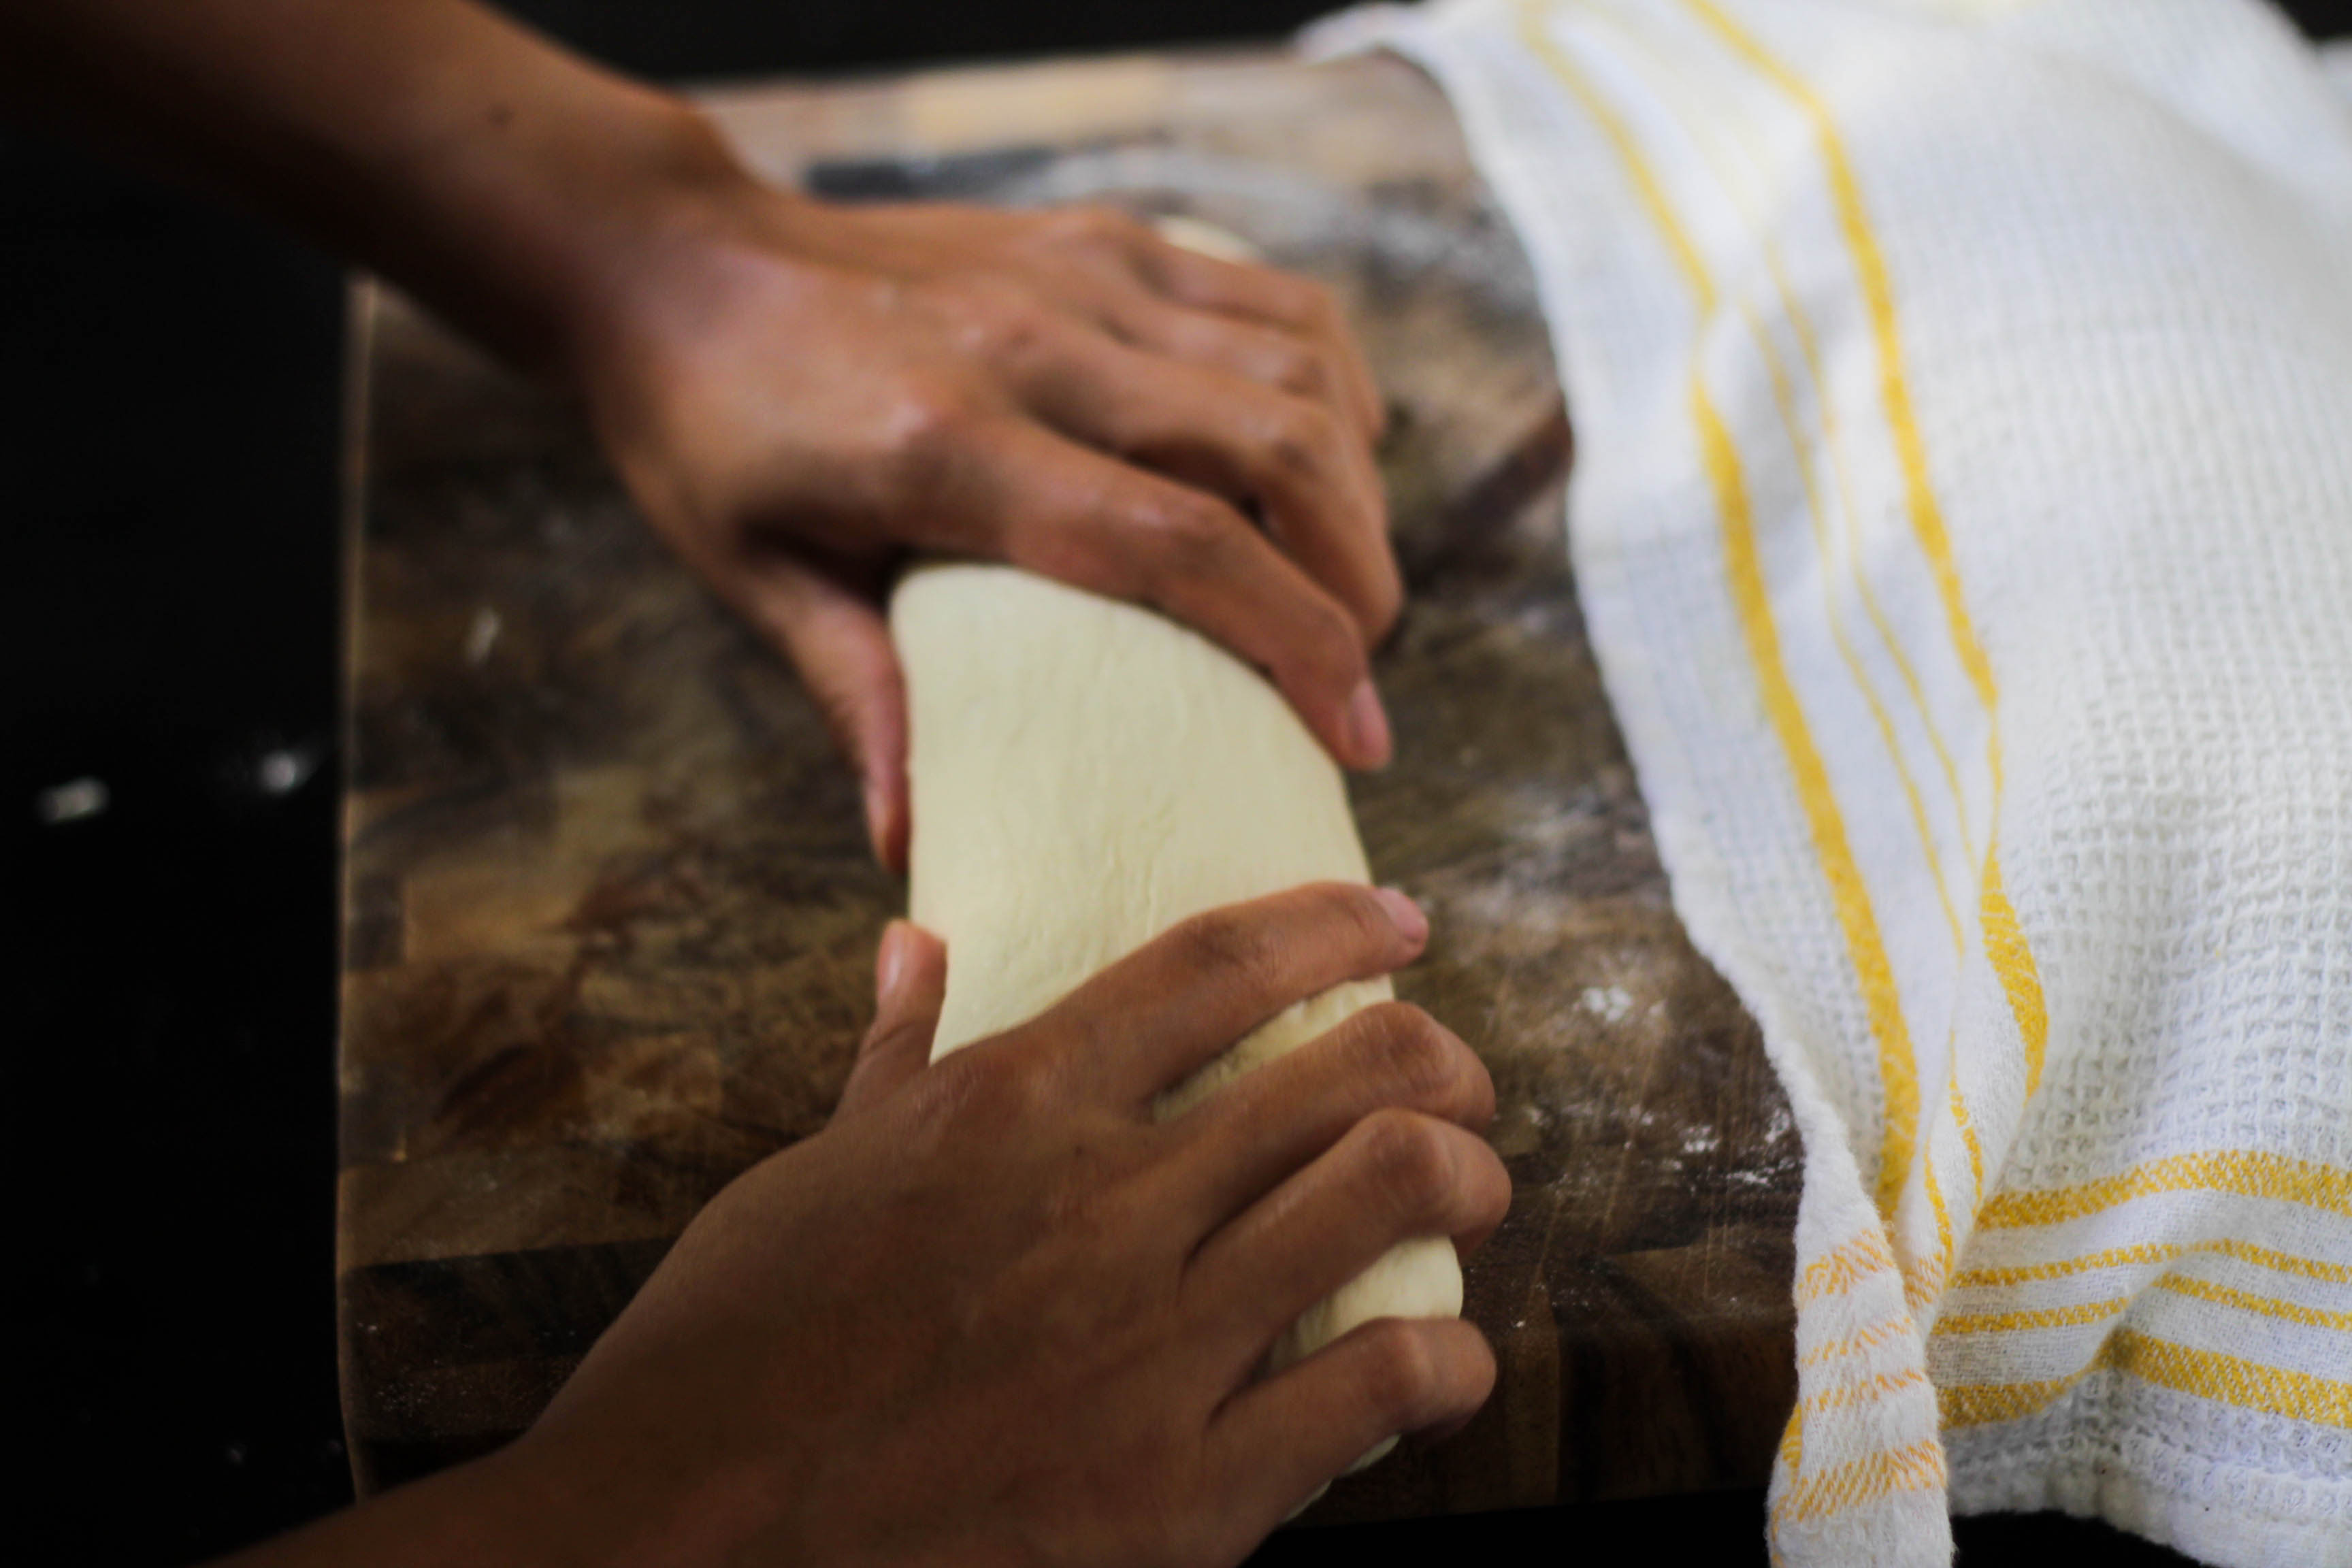
Once you have stretched the dough to an appropriate length, turn the dough to its ‘uglier’ side (whatever side reflects the rough edges that you initially folded underneath the ball, before its first rise) and chop the dough lengthwise down the center with your hand… no, really, like a karate chop!
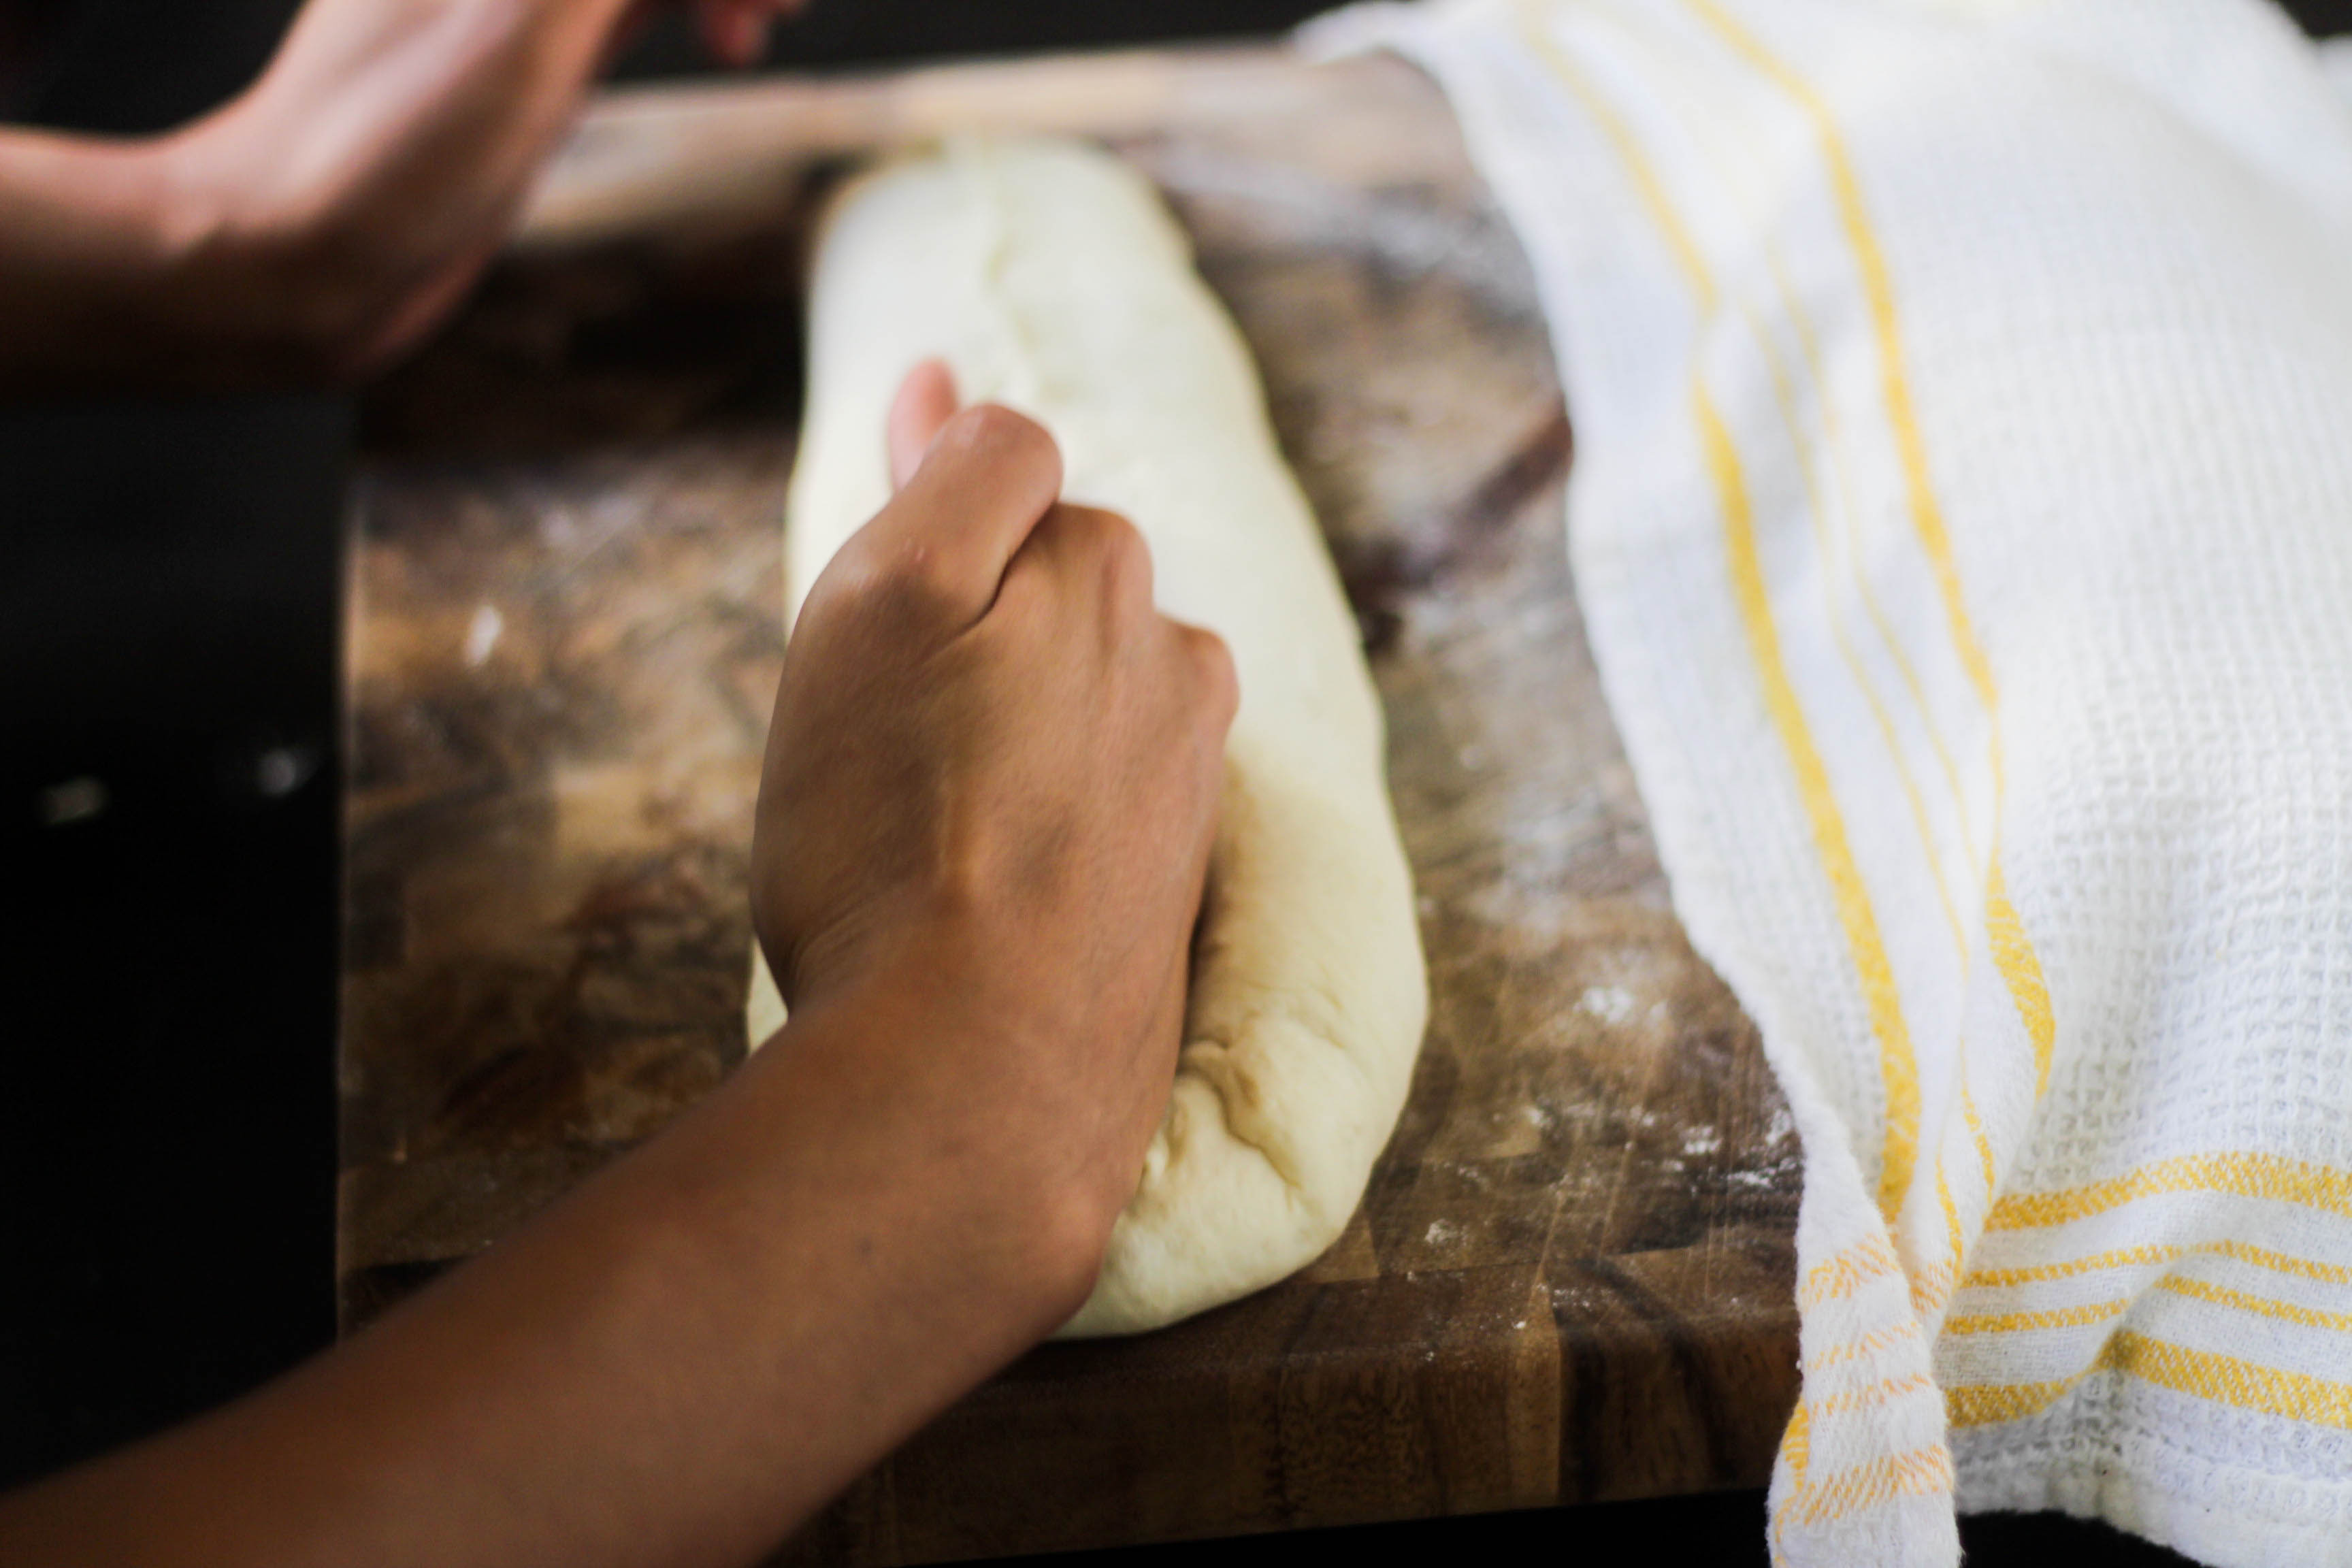
This will cause a gap in the center of the dough. Fold one of the sides to slightly overlap the other and pinch to seal in the gas produced by the yeast from escaping. Sound confusing? Here’s a picture that hopefully illustrates what I’m talking about:
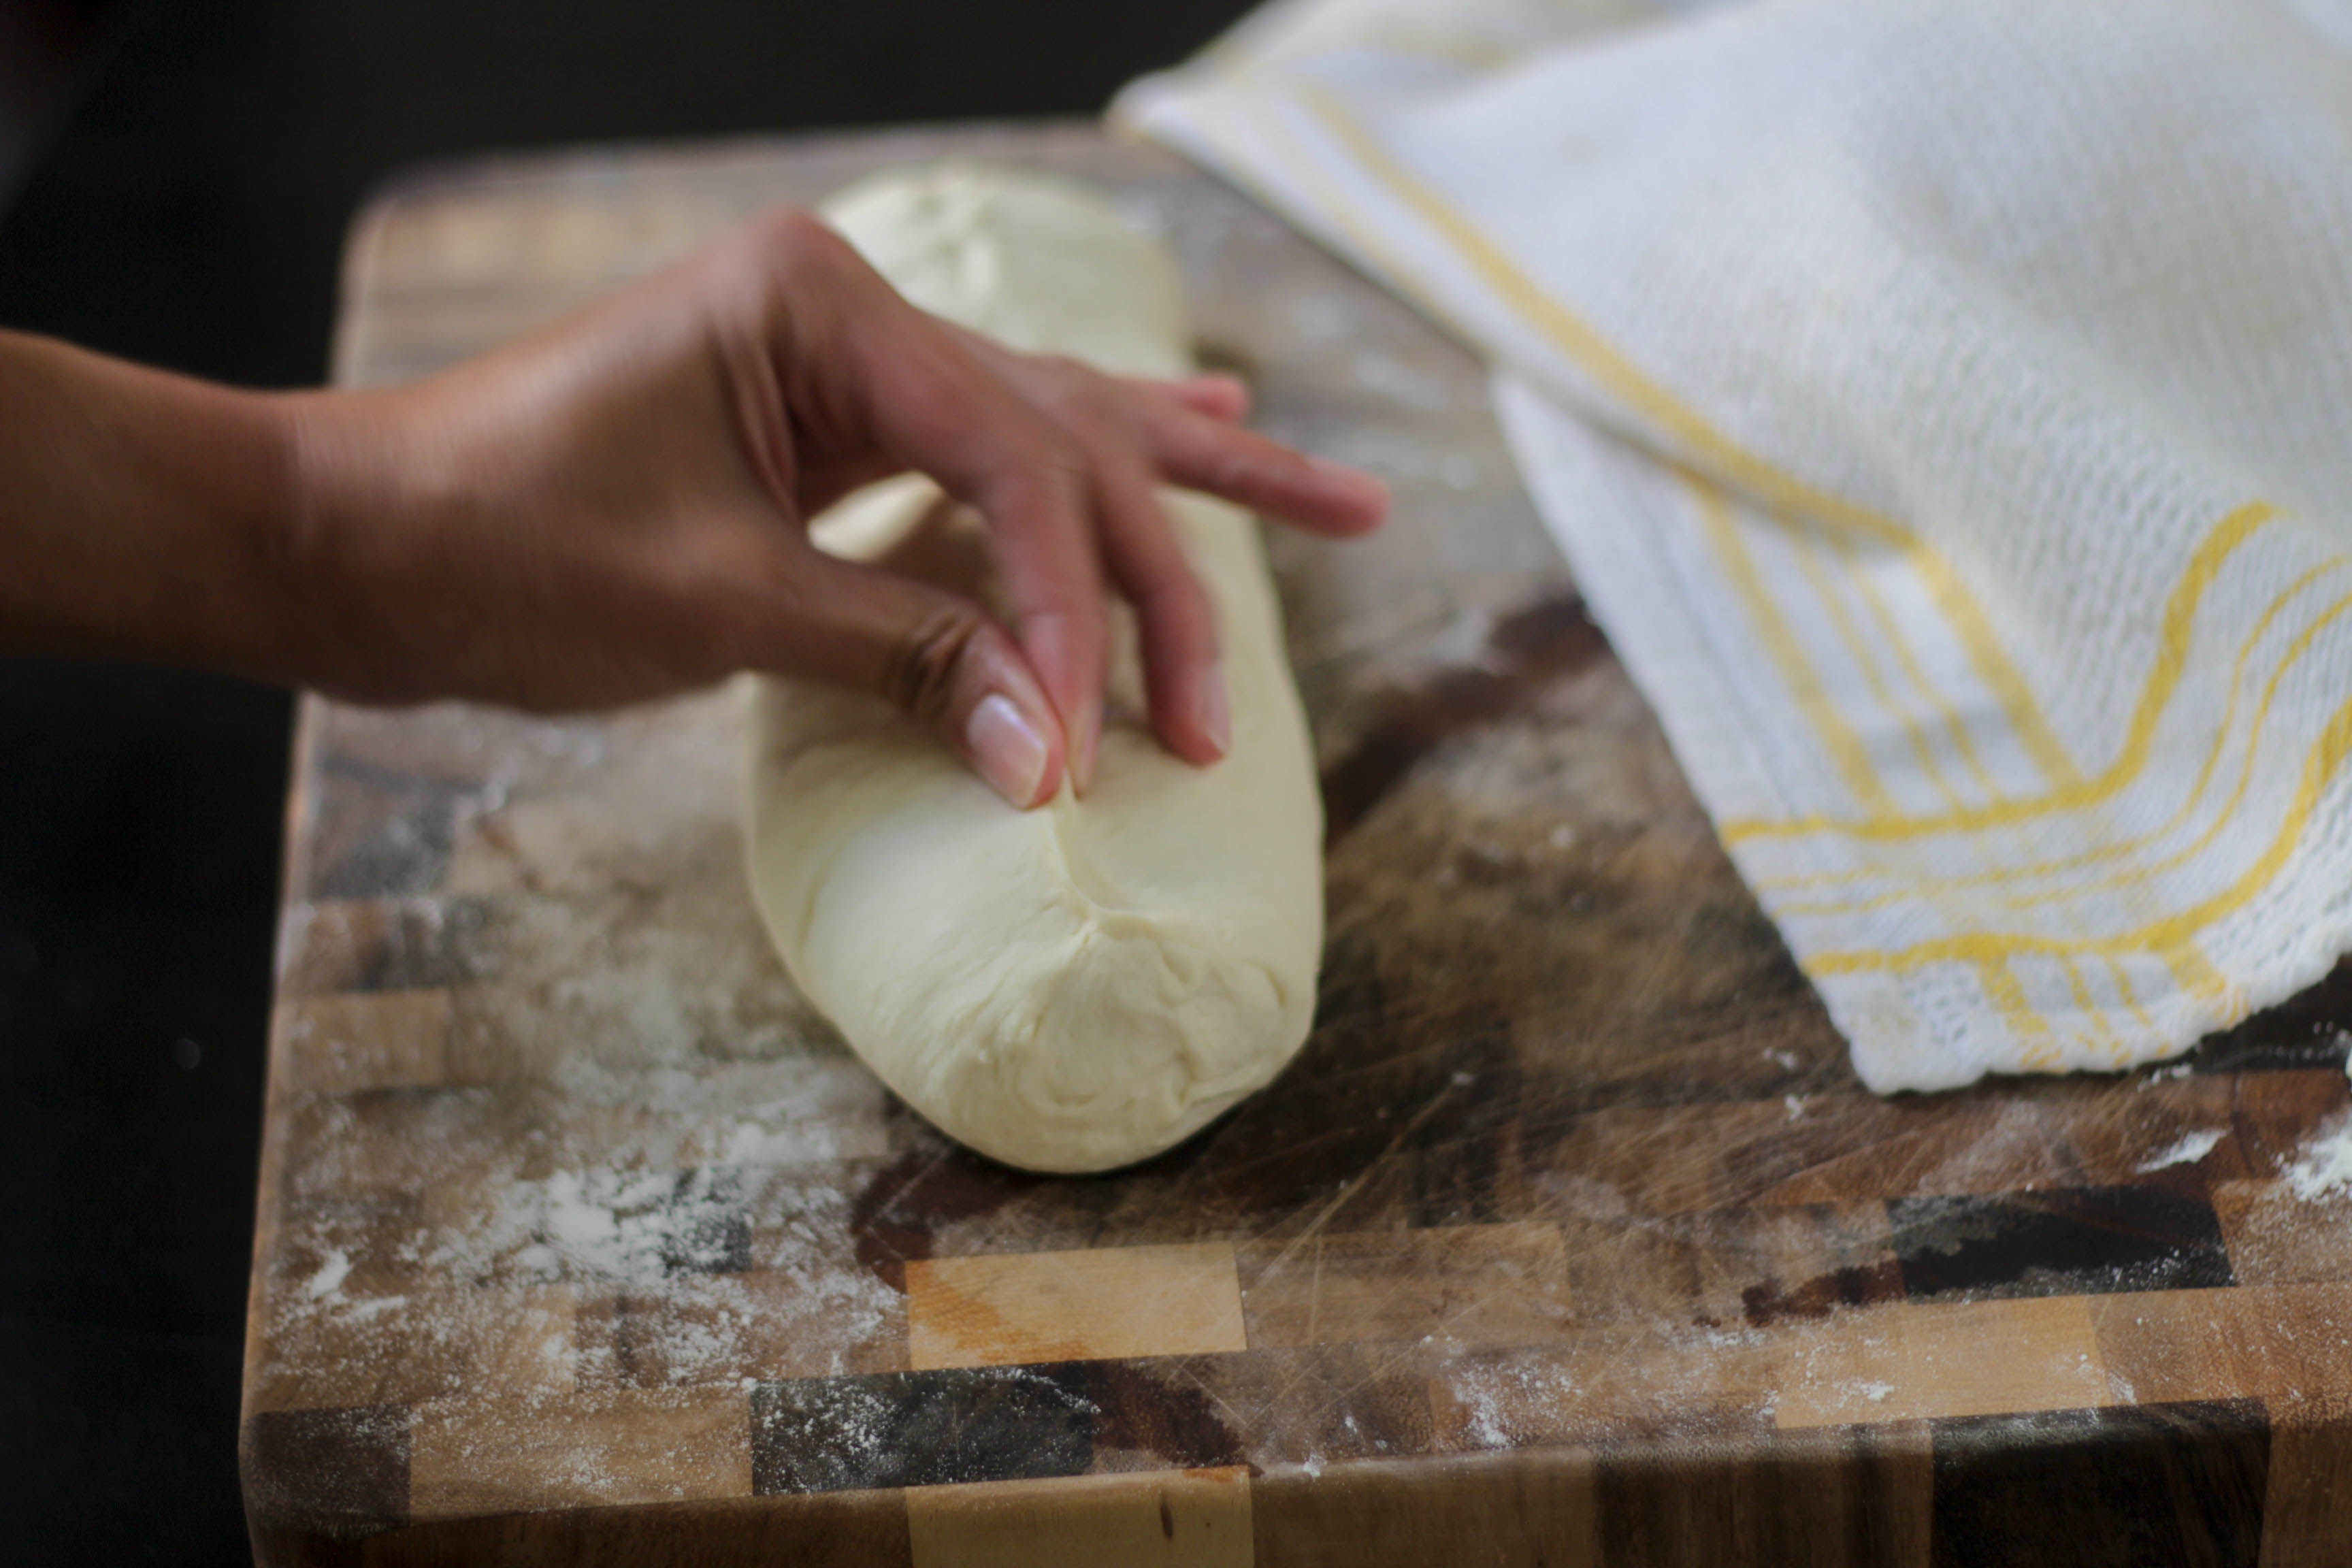
See how the ends are pinched into the center seam as well? This is probably one of the most important steps, as it makes the bread much less dense!
After you finish pinching the dough, turn it right-side up and cover it with a dish towel while you work on the other loaf. Once both are done, cover them with the towel and allow them to rise for another 30 minutes. In order to make the trip from the counter to the oven much easier, I slipped parchment paper underneath each loaf and would recommend you do the same! I then pre-heated the oven to 450ºF and placed my baking stone in the center rack to reach the same temperature as the oven.
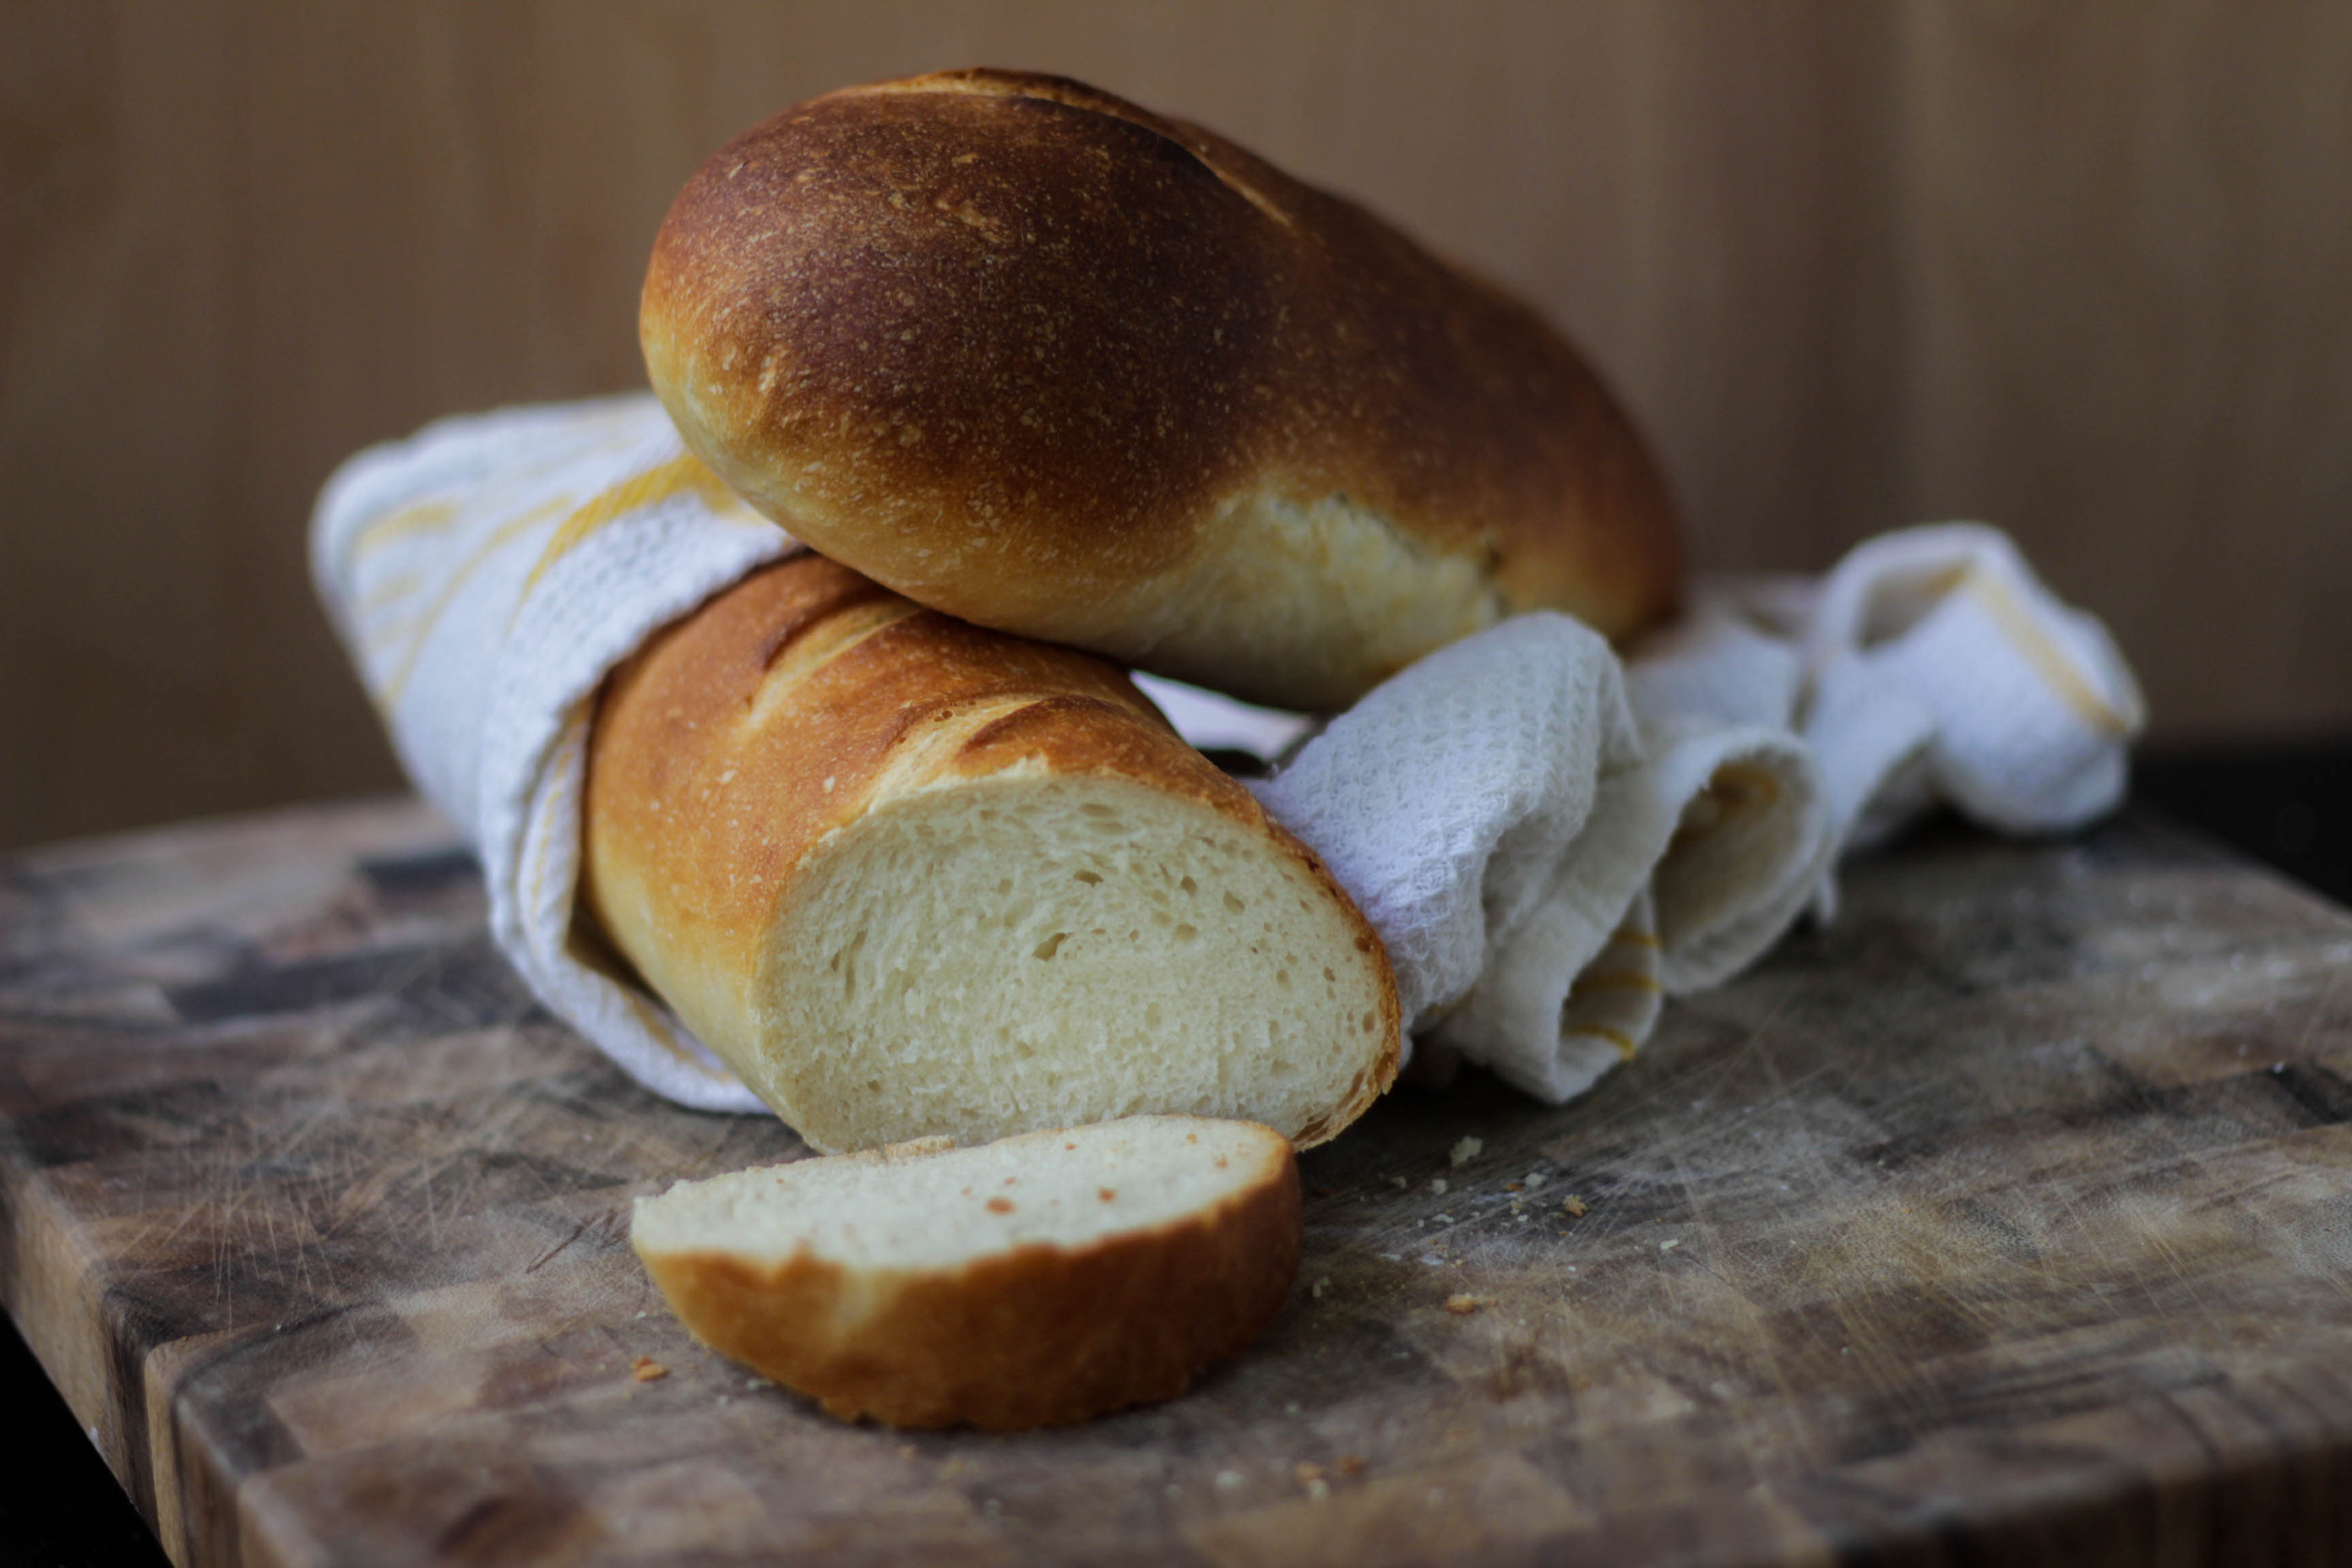
SIDE NOTE: Have you ever wondered how they managed to get the crust so glossy and brown at professional bakeries? Well, the (not-so) secret trick to doing so is introducing a lot of steam in the oven right after you place the dough on the baking stone. This creates condensation on what will be the crust of the bread, which then caramelizes into that beautiful, golden color that you see in the top picture of this post.
You can achieve this look by either throwing water onto the floor of the oven then quickly closing the oven door, or tossing a few ice cubes onto the oven floor. Now, I think it’s important to address how dangerous or harmful this can be for your oven before I encourage you to do it. Please keep the following in mind:
- DO NOT throw the water onto your oven floor if you have electric coils at the bottom of your oven!
- DO NOT leave un-tempered material (such as glass or stone) in the oven then toss the liquid/ice cubes onto these materials. They will shatter instantly!
When I do this trick, I place the second oven rack at the lowest level then place a tempered shallow metal pan (like a cookie or jelly pan–NO non-stick material, as this trick will ruin it) onto the rack while preheating the oven. This allows me to have the steam that is essential to a more professional-looking loaf while not risking my safety or breaking my oven!
Okay, that was the longest side note ever. Back to the process!
 When you’re ready to put the loaf in the oven, place four shallow diagonal cuts along the top of the loaf to let out any additional steam (I’m only using a chef’s knife because the rest of my knives are embarrassingly dull–use a paring knife to make sure the cut stays shallow). Ready your half cup of cold water/handful of ice cubes (if you’re following the trick I explained above), as you will need to move quickly to trap steam in your oven.
Once your oven is pre-heated, slide your loaf onto a pizza peel or a baking sheet (again, parchment paper makes this so much easier!), then open the oven and slide the bread into the baking stone. Now take your water/ice cubes and toss them onto the oven floor/tempered metal pan and shut the door quickly to trap the steam. And now, you play the waiting game until the bread is done. The recipe recommends 20-25 minutes, but every oven is unique–I would check after 15 minutes to make sure you don’t burn the crust.
(My oven strikes again–my second loaf ended up a little more brown than I wanted. It still tastes great though!)
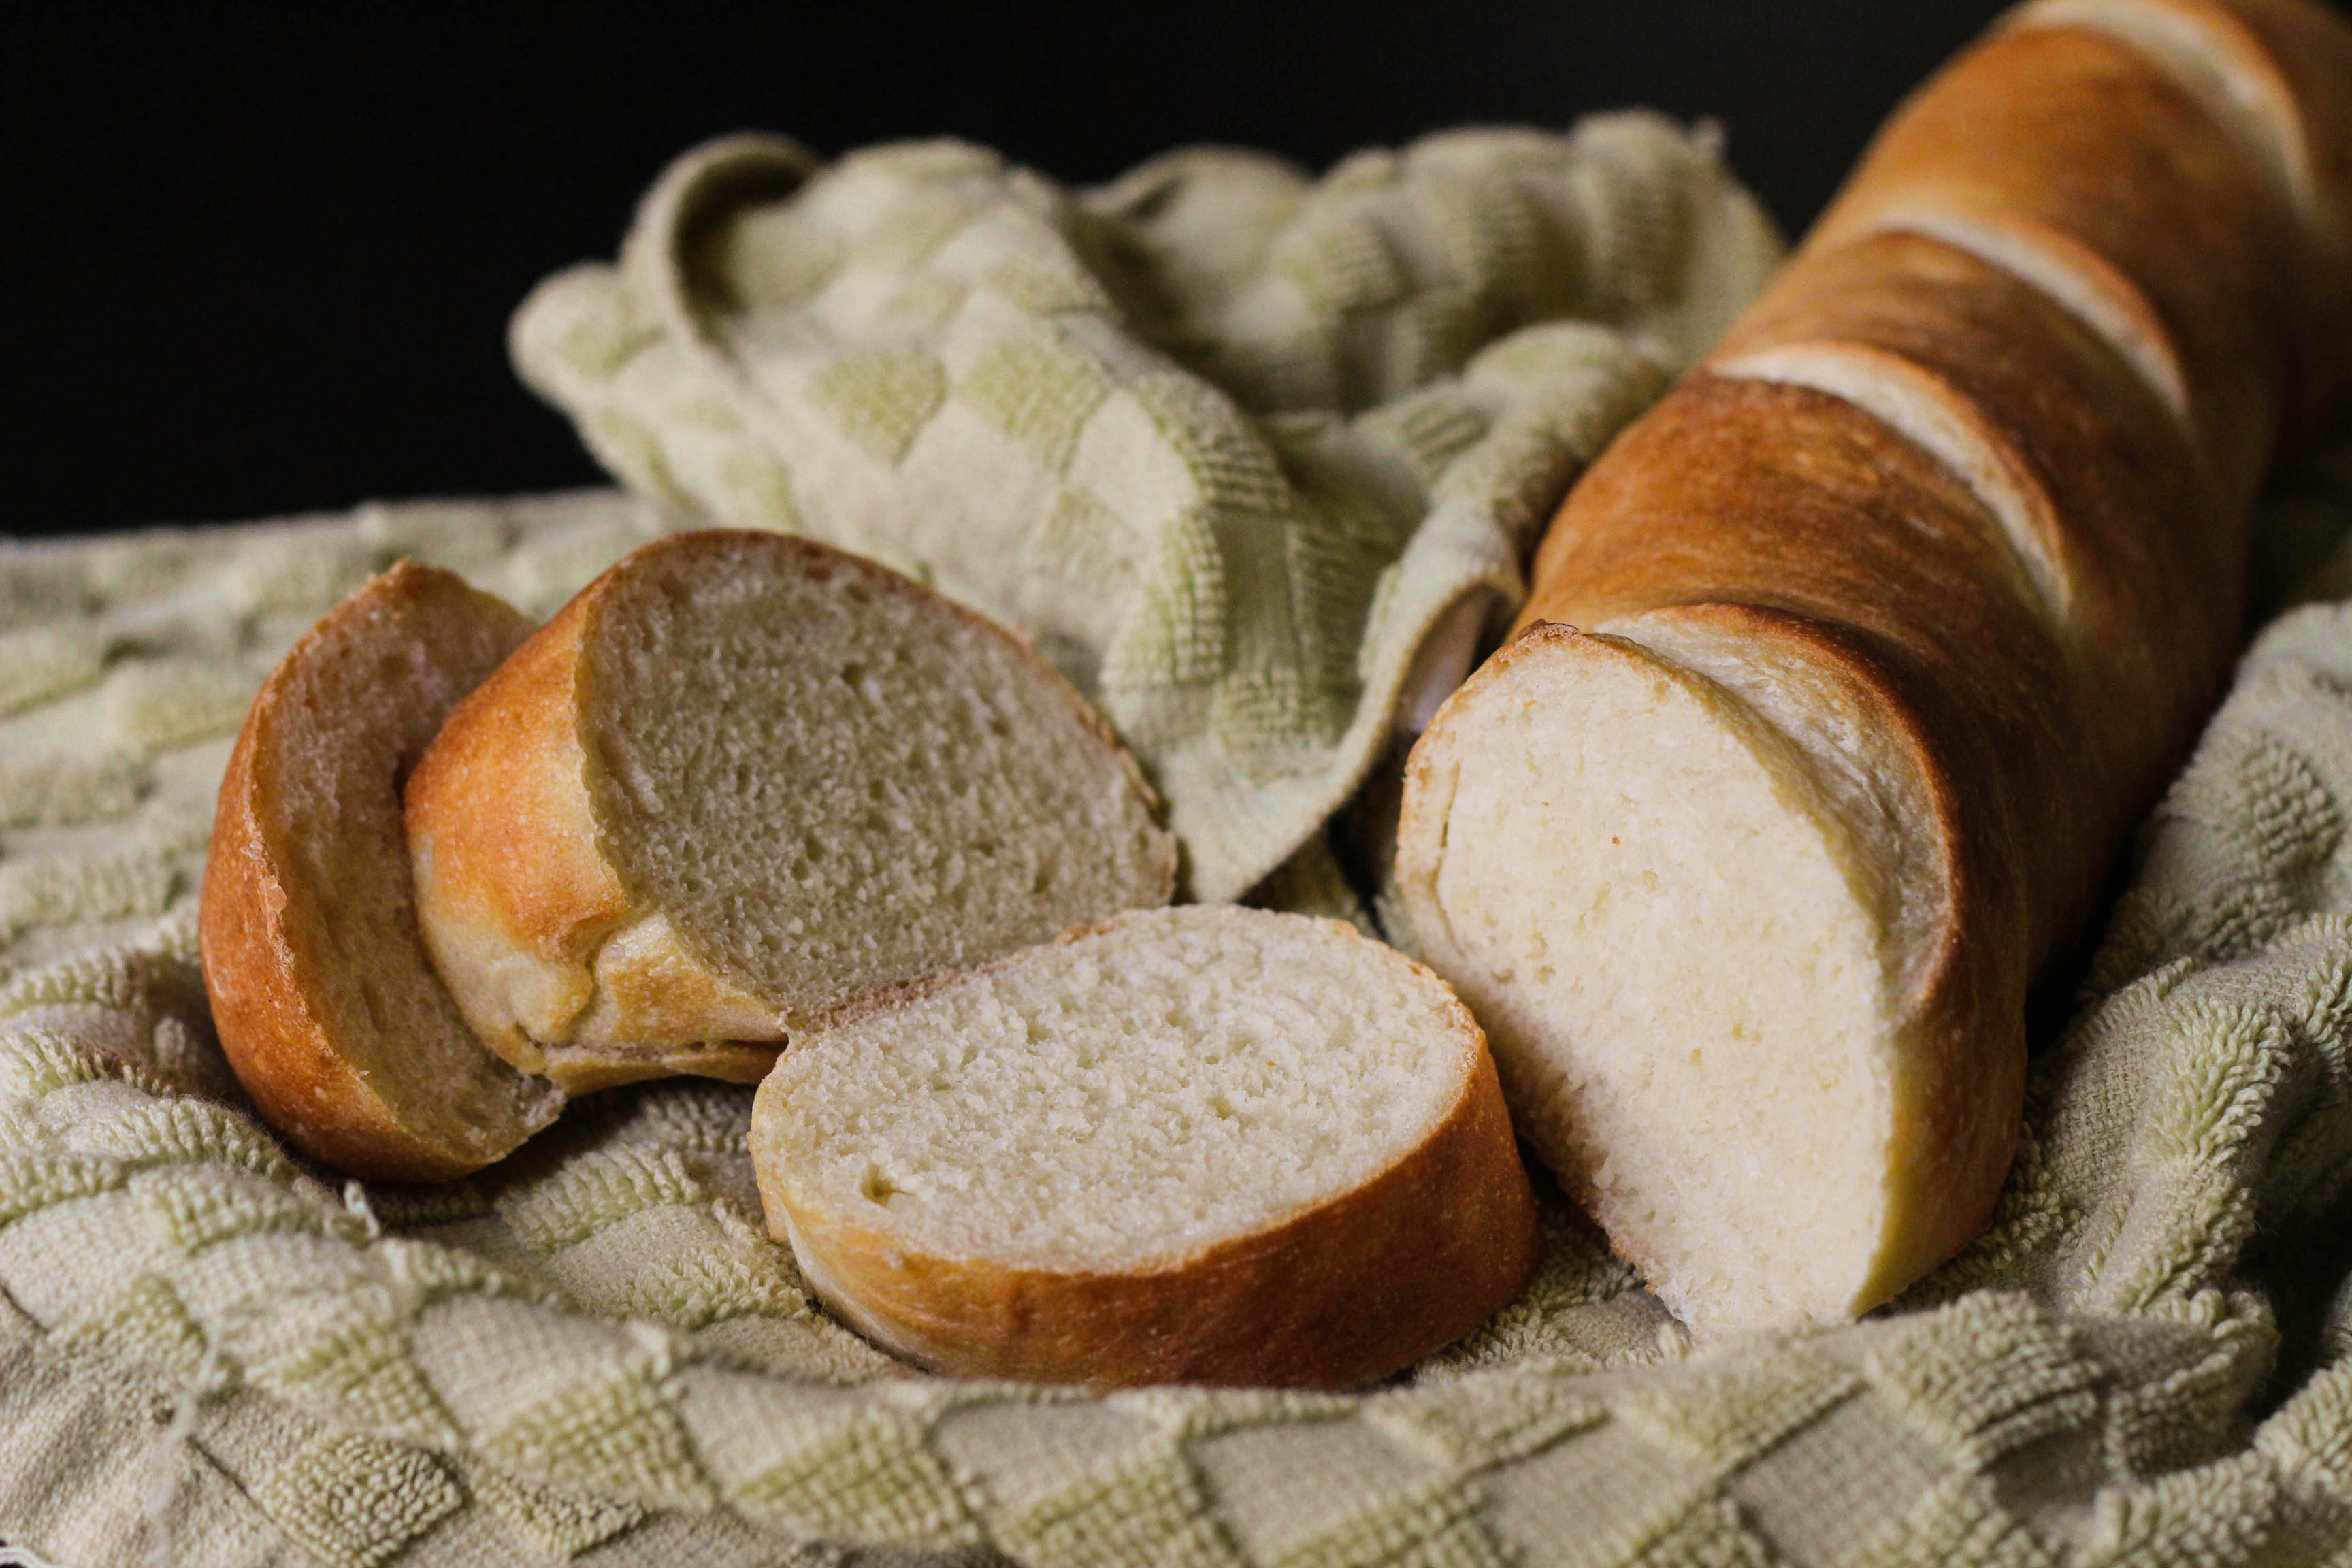
Once you take the loaf out of the oven, allow it to cool completely before slicing into it; it will initially be hard on the surface, reminiscent of a baguette. But as it cools, the crust will soften and become much easier to cut. And ta-dah! You have baked your own bread. It wasn’t so bad, was it?
I usually store my bread in a sealed plastic bag for the first 2 days, then place in the fridge for up to a week after baking. In order to prevent it from becoming stale after a week, I slice the remaining loaves then freeze them until I need them. It lasts for up to 6 months in the freezer!
Anyhow, I know this was more of a blog post than a recipe, but I hope it was helpful! This recipe was the catalyst that spurred on my love for baking bread at home, and I hope it will have a similar effect on others as well. The amount of pride you feel when you see an artisan bread come from your own oven is indescribable… or maybe I’m just a baking nerd. 🙂